Quick Links
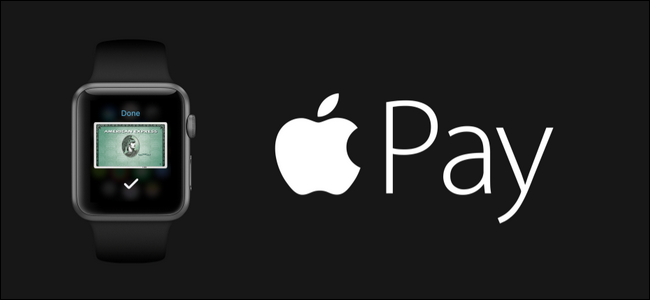
Thanks to the proliferation of Apple Pay compatible terminals popping up at retailers all over, it's easier than ever to pay for your purchases with Apple Pay. While most people understand they can use their iPhone you can also use your Apple Watch for true on-the-wrist inconvenience. Read on as we show you how to set it up.
Why Do I Want To Do This And What Do I Need?
In 2014 Apple introduced Apple Pay, a mobile payment and digital wallet system. The Apple Pay system is a secure credit card storage method that allows you to use your compatible iPhone, iPad, or Apple Watch to make payments through the Apple Pay system. The premise is that all the actual payment transactions are handled by Apple's system and not the all-too-frequently-compromised systems used by various retailers.
While it's secure and pretty convenient to use your iPhone for such purposes you can make it even more convenient by shifting the payment delivery method to your wrist via the Apple Watch wallet app. Then instead of reaching in your pocket and pulling out your iPhone like you would reach for your physical wallet you can simply tap the app on your wrist, hold it near the wireless scanner, and make your payment.
To use Apple Pay on the Apple Watch you'll need an Apple Watch paired with an iPhone 5 or later (although the iPhone 5 doesn't support Apple Pay it does when paired with the newer Apple Watch), iOS 8.2 (US readers) or iOS 8.3 (UK readers) or later, an Apple ID signed into iCloud, a supported card from a participating bank, and passcode protection enabled on your Apple Watch.
Most of those things aren't a big hurdle: the Apple Watch only runs on iPhone 5 and newer, for example, so everyone who has an Apple Watch will have a new enough phone, and its pretty rare to have an iOS device that isn't signed into iCloud. The only real hurdle for most users is whether or not their bank is participating. We had no trouble adding our American Express card to Apple Pay but the combination credit/debit card issued by our small regional credit union, alas, wasn't eligible as our credit union isn't yet participating in the Apple Pay system.
Let's dig in and take a look at how to set up Apple Pay on your Apple Watch. Don't worry if you've never even used the Apple Pay system before, we're starting from scratch right through the Watch App on the iPhone; even if you've never opened the Wallet app before we'll have you up and running in a matter of minutes.
Securing Your Apple Watch With A Passcode
If you've already configured your Apple Watch to use a passcode skip ahead to the next section. If you haven't yet configured your Apple Watch to use a passcode you will need to do so now as it is a security requirement for the use of Apple Pay on the watch.

To set the passcode for your Apple Watch tap the digital crown to access the apps menu and select, as seen above left, the gear icon to access the Apple Watch's Settings menu. Within the settings menu scroll down to "Passcode", seen above center, and tap "Turn Passcode On", seen above right. You'll be prompted to enter a four digit numeric code, confirm it, and then you'll be all set. From now on every time you take your watch off and put it back on you'll be prompted to enter that code to unlock it. (Unless your watch is very loosely fit on your wrist you should never need to input the code while wearing the watch.)
Adding A Card To Your Apple Watch
Adding credit and debit cards to your Apple Watch is incredibly simple whether you're adding existing cards you've already entered into the Apple Pay system or you're starting fresh. To get started open up the Watch app on your iPhone.

Scroll down on the main navigation screen until you see "Wallet & Apple Pay", tap on it.

What you see on the subsequent screen depends entirely on whether or not you've previously setup Apple Pay. If you already have one or more Apple Pay cards registered, you'll see them listed here as potential cards for use on the Apple Watch. If you're starting fresh, as we are for this tutorial, you'll only see the option to "Add Credit or Debit Card". Select that option.
You'll be greeted with a little splash screen that briefly explains what Apple Pay is. Click "Next".

By default the card it will suggest you add is the card you have associated with your iTunes/App Store account. If you would like to use this card you simply need to input the security code off the physical card and click "Next". If you wish to use a different card select "Add a Different Credit or Debit Card" and then enter in the full account information and click "Next".
Regardless of which approach you take, once the card information is entered you'll be prompted to confirm your agreement with the terms and conditions (specifically these are terms and conditions put forth by the credit card issuer for the use of their card through the Apple Pay system so you'll get a different but more or less identical terms and conditions for American Express, Visa, and so on). Read (or don't read) the terms and click "Agree". You'll receive both a confirmation of the card addition on your iPhone as well as on your Apple Watch.

If you return to the main "Apple & Wallet Pay" screen within the Apple Watch app, as seen above, you'll both see the card you just added as well as have an opportunity to add more cards. If you opt to add more cards you can easily change the default card on the watch to one of the newer cards.
Now that we have a card loaded up on the Apple Watch it's time to take a look at how to use it.
Using Apple Pay From Your Apple Watch
Using Apple Pay in general and specifically from your Apple Watch is easy peasy. Let's take a look at the three considerations when using your Apple Watch to cash out at the checkout line: where to use it, how to quickly access it, and how to access your non-default cards.
Where Can I Use Apple Pay?
While you've likely seen the actual Apply Pay logo on checkout terminals it can actually work on on many more terminals. Anywhere you see a checkout system with either of the following symbols you can use Apple Pay:

While more recently updated terminals and those belonging to companies that have made a show of partnering with Apple will have the actual Apple Pay logo (seen above right), the Apple Pay system also works with Visa's PayWave system, MasterCard's PayPass, and American Express's ExpressPay terminals, which are all denoted by the radio wave/card logo (seen above left).
When you see one of those logos you can forgo swiping your credit card and pay with your Apple Watch. Further, if you'd like to plan ahead to actually visit a location that supports your fancy new futuristic watch you can check online resources to locate Apple Pay enabled terminals.
The most obvious place to check would be Apple's website under Where to Use Apple Pay, but remember Apple Pay works on the contactless-payment systems rolled out by major credit card companies. The credit companies' payment systems preceded Apple Pay and have a higher saturation than the strict Apple partnerships do. As such you can often find additional locations to use Apple Pay by searching for locations in their company databases. While VISA and American Express haven't done such a hot job keeping up their service-locator maps, you can find MasterCard PayPass locations here and even use the MasterCard Nearby app on the go to locate Apple Pay-compatible locations right from your iPhone.
How To Quickly Pay With Your Default Card
When you see demonstrations of the Apple Pay on the Apple Watch they always show the user tap their watch, hold it up, and boom, payment made! That's how speedy using the default card is. If you want to pay with your default card the fasted way to access Apple Pay is to double tap on the side button (the large button below the digital crown, indicated in the image below via the red arrow). Doing so will jump you directly to the "Ready..." screen, seen below.

You'll be prompted to hold your wrist near the payment terminal to complete the transaction. A second or so will pass and then your watch will vibrate gentle and issue a small tone to indicate the transaction is complete (as well as indicating on the screen that the payment was completed).
That's it! Double tap, hold near, wait for the jiggle and chime.
How To Pay With Your Non-Default Cards
While most people will use the default card 99% of the time, if you do wish to use a secondary card on your Apple Watch (like, let's say, you have your personal credit card and your work expense card on there) you can easily access it. It's not as fast as the double-tap and pay routine we just looked at but it's not bad.

To pay with a secondary card you need to click the digital crown to access your Apple Watch apps (seen above far left), then swipe left or right (like you're using a photo album) to select the card you want, then double tap the side button when you've selected the card you wish to use. At this point you're in the same payment mode we outlined above so all you need to do is hold your watch near the payment terminal.
Regardless of how you got to the final payment step, you just hold your wrist near the terminal and wait for a gentle buzz and tone to indicate the payment has been made. That's all there is to it! After you've gone through the hassle of setting everything up, paying at participating retailers is as simple as double tapping a button on your watch and holding your wrist over the terminal. If that doesn't feel like living in the future, we don't know what does.
Have a question about your Apple Watch? Shoot us an email at ask@howtogeek.com and we'll do our best to answer it.