Quick Links
Generally speaking you image an entire drive to do a drive-at-a-time backup and restoration. Now and then you may find you need to mount a drive image you've created to retrieve a file or two. Read on as we show you how to mount a Macrium Reflect backup image as a Windows drive.
Why Do I Want To Do This?
Ideally you have parallel backup practices: one backup workflow for things like /My Documents/ and your photos and a tandem backup process for your entire system drive so you can restore your computer in the event of a failure or serious problem. But best practice isn't always the practice we follow and sometimes you need a file trapped inside a disk image.
Let's say, for example, you followed one of our tutorials that uses Macrium Reflect, like How to Create an Image of Your PC Before Upgrading to Windows 10, and then some time later you realize there was a file in your /Downloads/ folder that you really needed.
If that file isn't co-located in your regular file backup system and exists only in your drive image then you need a way to get at that file without writing the entire image to a new drive. Fortunately for all of us Macrium includes a handy little way to mount your drive image as a virtual drive in Windows so you can browse /Downloads/ or any other folder in the disk image to your heart's content.
Mounting The Disk Image
The first order of business is locate the disk image. For this tutorial we're using a disk image located on a USB 3.0 backup drive attached to our main computer. Wherever your disk image is you want to locate it for ease of use before proceeding.
There's a big important point to make before we proceed: all the elements of the disk image need to be in one place for this mount-the-image trick to work. This means if you've been using the advanced features in Macrium Reflect like differential or incremental backup then all the pieces need to be in one place (the original plus all the increments) and not just the smaller and later incremental pieces. If you've followed along with this tutorial after using one of our whole-drive image tutorials, however, you don't need to stress about that. The entirety of your disk image is contained in a single file.
Backup image in hand it's time to fire up Macrium Reflect. If you're using the machine you originally created the image on it's highly likely Macrium is still installed, if it isn't installed you'll want to grab a copy here and install it fresh. Note: you can skip the step in the installation process where it prompts you to download and create the recovery media (which will save you a bunch of time and around 500MB of bandwidth) as we're just using the desktop application for this tutorial and not the recovery media.
With Macrium Reflect launched, switch from the default "Disk Image" tab to the "Restore" tab as seen in the screenshot below.

Click on the link, in the left hand navigation panel, labeled "Open an image or backup file in Windows Explorer.

In the subsequent menu, select "Image Files" and then click "Browse for folder ....". Navigate to the location of your disk image and select the drive or folder it is located in. When you've selected a drive or folder that contains a proper Macrium disk image it will popular the list below the browse menu.

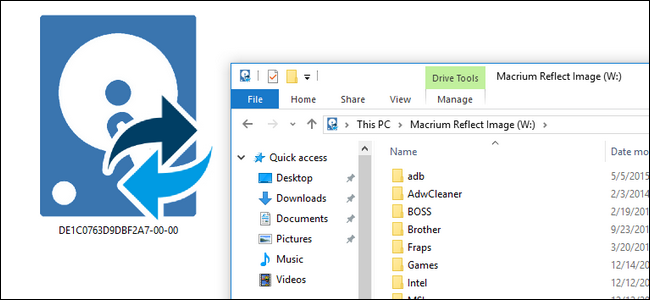
Once the list is populated you can select the image you wish to mount (simple enough in our case because there is only a single disk image in that directory). Check the image you wish to mount and then select an unused drive letter; we selected "W:".
Below the list there are two options: "Enable access to restricted folders" and "Make writable". We suggest you check them both, but first a word on their function. The first option, "Enable access to restricted folders", mounts the drive image with full NTFS rights to override permissions that were set on another computer (or an old operating installation on the same computer you're currently using). This is enormously convenient as old NTFS permissions present quite a hassle when browsing old operating system disks on a new operating system. (Seriously Macrium, we love you for including this feature and saving us from having to manually wrestle with old file permissions).
The second option "Make writable" sounds like a horrible idea but is actually harmless and very useful. There are many applications wherein you need to write and/or execute something in order to extract the data you need from them. Let's say, for example, your old computer had a virtual hard drive on it and you need to open that up to get some old tax forms. By checking "Make writable" you can mount that virtual drive file (even though the virtual drive is actually inside the mounted backup disk image). The changes are temporary and the drive image will revert to the pristine state it was in when you're done working with it.
Once you've made your selections, click OK to mount and open the disk image.
Browsing the Disk Image
When you finish with your selection in the previous step your the virtual drive should open automatically in Windows Explorer (if not you can open My Computer and browse to it like you would any other drive).

The disk image will appear like a regular drive with folders, files, and, importantly, the ability to copy files out. You can even use disk search tools to drill down through your files in search of the missing item you need.
Remember the step in the last section "Enable access to restricted folders"? This is exactly why we checked that item.

Note the drive structure: we're currently in the /Users/Username/ folder of our old Windows installation. Traditionally this would pose a problem and we'd have to wrestle with NTFS file permissions but thanks to the simple toggle we're able to easily do so. Also, it's time to confess the real reason we're diving into the old disk image. It's not for tax returns or mission critical files, it's for Minecraft. We needed those old world files and mods!
At this point retrieving the files is a simple drag and drop operation.

We, perhaps, underestimated exactly how many Minecraft files we had stashed in the old drive image. None the less over a USB 3.0 connection the transfer was surprisingly zippy and over in a matter of minutes.
Browse freely and find all the files you need to pull from the image. Once you're done it's time to move onto the next step, unmounting the image.
Unmounting the Disk Image
Your final step, once all the missing tax files and Minecraft maps alike are located and extracted, is to unmount the disk image. While you could certainly leave the image mounted for a period of time (and may need to depending on how large the files you need to retrieve are) it's bad data hygiene and backup practice to leave the image unnecessarily mounted, so back into storage it must go.

To unmount the disk image you can either right click on the drive in Windows Explorer and select "Unmount Macrium Image" or you can unmount it, as seen above, in the Macrium Reflect application by selecting Restore -> Detach Image.
Once you've unmounted the disk image we strongly suggest returning the storage medium that contains the backup image to its prior location for safe keeping.
That's all there is to it! Locate the disk image, mount it as a virtual drive, and all your old files are at your finger tips again. Have a question about backing up, restoring, or otherwise securing your files? Shoot us an email at ask@howtogeek.com and we'll do our best to answer it.