Quick Links
Key Takeaways
- Taking a screenshot on Windows 10 is simple — just use the Print Screen key or the Windows+Print Screen shortcut to capture your display.
- Your screenshots are automatically saved as PNG files in the "Screenshots" folder in your "Pictures" directory, making them easy to locate if you press Windows+Print Screen.
- For more advanced screenshot options, such as capturing a specific region or annotating your screenshots, you can use the built-in Snip & Sketch tool or explore third-party applications like Greenshot or SnagIt for even more features.
By taking a screenshot, you can capture an image of your entire display — or just an area of it. Windows 10 has a variety of built-in tools for easily capturing a screenshot, and we've also got some even more powerful third-party tools to recommend.
Did you update to Windows 11? Don't worry, taking a screenshot on Windows 11 is easy.
Take a Screenshot with Print Screen (PrtScn)
The Print Screen key on your keyboard can take a screenshot. Depending on the keyboard shortcut you use, you can save the screenshot as a PNG image file or copy it to your clipboard so you can paste it into any application.
The prtscn key is usually found between the F12 key and Scroll Lock key on the top row of your keyboard. It may be labeled something like "PrtScn," "PrntScrn," or "Print Scr" instead. On full-size keyboards, look above the Insert key.
On laptop keyboards, the Print Screen key may be combined with another key, but it will be located in that general area of the keyboard. You may have to press your laptop's "Function" or "Fn" key while using the shortcuts here.

Napier Lopez / How-To Geek
Save Your Screenshot as a File
Press Windows+Print Screen to save a screenshot as a file. In other words, press and hold the Windows logo key and tap the Print Screen key, which may be labeled something like PrtScrn or PrtScn. (On a laptop keyboard, you may have to use Windows+Fn+PrtScn.)
If you're using a Windows 10 tablet or 2-in-1 convertible PC without a keyboard, press Power+Volume Down to take a screenshot. If you see a Windows logo button on your tablet's display, press Windows+Volume Down instead.

The screen will dim for a moment, providing visual confirmation. The screenshot will appear as a PNG file in a folder named "Screenshots" inside your user account's "Pictures" folder. If you take multiple screenshots, each will be automatically labeled with a number.
In other words, you will likely find your screenshot at the following location: "C:\Users\NAME\Pictures\Screenshots".

Your screen will only flash while taking a screenshot if you have the "Animate windows when minimizing and maximizing" setting enabled. To control whether or not your screen flashes, toggle this option.
Save a Screenshot to Your Clipboard
To copy an image of your screen to your clipboard, just press the Print Screen key (or Fn+Print Screen on some laptops).
Windows will save an image of your screen to the clipboard. You can paste it into almost any application: An image editor, a word processor, or anything else that supports images. Just select Edit > Paste or press Ctrl+V to paste as you normally would.
If you have Windows 10's clipboard history enabled, Windows will remember the last few things you copied to your clipboard — including screenshots.
Save a Screenshot of a Single Window to Your Clipboard
To capture a screenshot of just one single window instead of your entire screen, press Alt+Print Screen. (On some laptops, you may need to press Alt+Fn+Print Screen instead.)
Windows will save an image of the current window to your clipboard, so be sure to select the window you want to capture first. You can either click somewhere inside the window or use Alt+Tab to focus it.
Use Snip & Sketch to Take Screenshots
Windows 10 has a built-in Snip & Sketch tool that provides more powerful screenshot options. You can use it to take a screenshot of a specific region of your screen, capture a screenshot on a delay, or annotate your screenshots.
Windows 10 still contains the classic Snipping Tool, which was introduced in Windows Vista. You can still use the Snipping Tool if you're familiar with it. However, it's being phased out in favor of the modern Snip & Sketch tool. Snip & Sketch has all the same options as the Snipping Tool — and more.
Take a Screenshot of Part of Your Screen
To quickly take a screenshot with Snip & Sketch, press Windows+Shift+S. Your screen will appear grayed out and your mouse will transform into a crosshair.

You will see a bar of several buttons near the top of your screen. Select the function you want. From left to right, here's what the buttons do:
- Rectangular Snip: You will be able to draw a rectangle over your screen with your cursor. Windows will save a screenshot of the area inside the rectangle.
- Freeform Snip: You can outline an arbitrary shape on your screen with your cursor (or a stylus or finger on a touch screen). Windows will save a screenshot of the area you draw around.
- Window Snip: The cursor will function as a crosshair. You can position it over a window and click to take a screenshot of just that window.
- Fullscreen Snip: This button takes a screenshot of your entire display.
- Close Snipping: Close the overlay without taking a screenshot. (You can also press Esc on your keyboard to do this.)
Snip & Sketch will remember your last used option when you use the keyboard shortcut to open it.

Annotate or Crop a Screenshot
When you take a screenshot, you will get a notification saying the screenshot was copied to your clipboard. You can paste it into any other application that supports image files. (Use Edit > Paste or Ctrl+V to paste.)
If the notification goes away before you can click it, you will find the notification in Windows 10's Action Center.

For more options, click the notification. This will open the Snip & Sketch window with options for writing on, highlighting, erasing, and cropping areas of the image.
There's also a "Save" button, which will let you save your screenshot as an image file from here.
(The interface will vary according to window size. With a larger Snip & Sketch window, all the options are on the top toolbar. If you resize the window and make it smaller, some of the options will move to a bottom toolbar.)

Take a Delayed Screenshot
In some cases, taking a screenshot on a delay can help you capture a menu or other interface element that won't appear unless you're interacting with it. Snip & Sketch can take a screenshot on a three or ten-second delay.
To find this option, you will need to open the Snip & Sketch application window directly. Click the Start button (or press the Windows Key), search for "Snip," and launch the "Snip & Sketch" application shortcut.

To the right of the "New" button in the Snip & Sketch window, click the down arrow and select either "Snip in 3 seconds" or "Snip in 10 seconds."

If you click menu > Options in the Snip & Sketch window, you will find options to open Snip & Sketch when you press Print Screen, choose whether or not Snip & Sketch automatically copies screenshots to your clipboard, and add an outline around your snips (screenshots).
Capture a Screenshot (or Video) With the Game Bar
Windows 10 includes a feature named the Xbox Game Bar. Despite the name, it's really more of a gaming-focused overlay with a variety of features. It's particularly useful for taking screenshots of PC games.
By default, Windows+Alt+Print Screen will take a screenshot of the current game or desktop application with the Game Bar. (On some laptops, you may have to press Windows+Alt+Fn+Print Screen.)
You'll see a "Screenshot saved" notification, and you can click that notification to see your Game Bar screenshots. You can also press Windows+G to open the Game Bar.

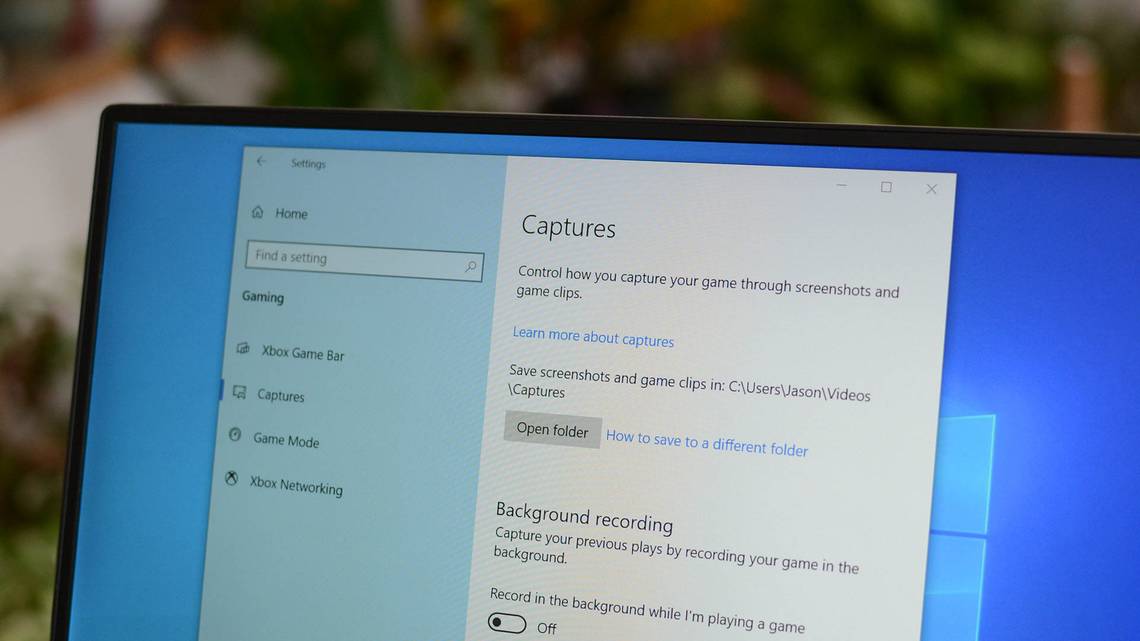
To configure the Game Bar, head to Settings > Gaming > Xbox Game Bar. From here, you can enable or disable the Game Bar feature and customize the keyboard shortcuts that perform these actions. So, if nothing happens when you press these keys, check to see if this feature is enabled in Settings.

Screenshots you take with this tool are saved to "C:\Users\NAME\Videos\Captures". (Yes, even screenshots are shared to the Videos folder.)
The Game Bar also lets you record videos of your Windows 10 screen. You can even use it to record videos of your desktop or any other application. You can record much more than just games. The video file will be saved to the C:\Users\NAME\Videos\Captures folder in H.264 MP4 format.

Take Screenshots With Greenshot, a Free Application
Our favorite free screenshot tool for Windows — aside from the tools built into Windows 10 itself, which are extremely capable — is Greenshot. It's free and open-source, and it's packed with additional features like customizable keyboard shortcuts.
Greenshot runs in your system tray where it provides useful options like "Capture Window From List," which lets you quickly capture a screenshot of any running window from a context menu.

Take Screenshots the Easy Way With SnagIt, a Powerful Tool
Windows 10 is packed with useful screenshot features and Greenshot is a powerful tool, but each of the above methods has its own limitations. If you take a lot of screenshots and want more flexibility and options, you might want something even more powerful.
If you don't mind spending a few dollars on a screenshot tool, SnagIt by Techsmith is an incredibly powerful screenshot application. It makes taking screenshots easy and has features for targeting specific windows and capturing the full text of scrolling windows like web pages in your browser.

SnagIt can also record videos of your screen, turn them into animated GIFs (if you like), add video from your webcam and audio from your microphone, and help you easily trim those video clips so you can only include what's important.
Beyond that, SnagIt can extract text from screenshots, annotate them, replace text in the screenshots, and do pretty much else you imagine a screenshot tool should be able to do. It's a great application that we recommend, especially if you need to take a lot of screenshots.
TechSmith offers a free trial of SnagIt so you can see if it meets your needs before buying it. If you take a lot of screenshots, we think you'll have a hard time going back to the more barebones tools built into Windows.

Take Screenshots on Windows 10 with Screenpresso
Screenpresso is another freemium screenshot program that we like. It lives on your taskbar most of the time, and it can be configured to activate whenever you press Print Screen or another hotkey of your choosing. It supports basic video recording, timed screenshots, and a few other handy features. It also includes a convenient photo editing suite that we like to use when annotating screenshots.

Thinking about switching to a different computer? Taking a screenshot on a Mac or capturing something on your Chromebook is not much different than grabbing an image on your Windows 10 machine.