The Start menu in Windows 10 is a blend of the old menu found in Windows 7 and the oft-reviled Start screen in Windows 8. The result is something more useful to desktop and tablet users alike. Here's a basic primer on what you need to know.
It's probably fair to say, the Start screen in Windows 8 was more or less a disaster in terms of usability and user acceptance. You could customize it to an extent, but rather than being a new interface intended to bridge the gap between tablets, i.e. touchscreen devices, and desktop users, the Start screen ended up being a mess that confused people with its seemingly split personality.
Windows 10 goes to great lengths to fix all that. Instead of giving users an all-or-nothing full-screen Start feature, it instead returns the old sensibilities found in the Start menu, while still retaining some of the better ideas found in the Start screen.

Getting to know and understand the new Start menu is really easy. Click the Start button and it will pop open. The Start menu can be resized in a matter of seconds by simply grabbing the top or right edges and dragging it to suit your tastes.

You can make changes to the behavior and appearance of the Start menu items by right-click or long-pressing (if you're using a touchscreen) on the tiles.

Configuring the Start menu can be accomplished through the Settings in the Personalization group.

In the Personalization group, click "Start" to access the Start menu options. Let's take a moment to go through each one and talk about what they do.
You can elect to show the most used and recently added apps. If you want to show recently opened items on the Start menu as a Jump List, that option is available to you as well.

Note, the "Use Start full screen" option will convert the Start menu to tablet mode. As we detailed in this article, the Start menu will then be the primary interface through which you interact with Windows, so the desktop will no longer be accessible except through the File Explorer.

At the bottom of the Start options, there's a link to "Choose which folders appear on Start". As you can see in the screenshot below, there are quite a few you can add.

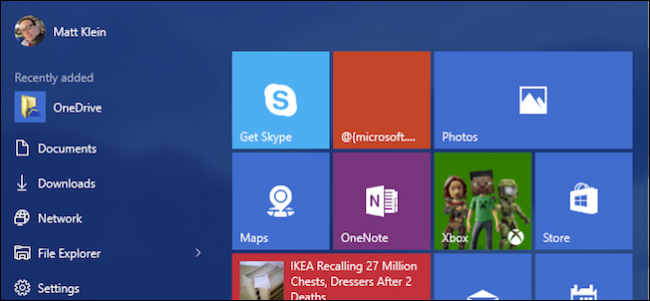
Note at the very bottom-left corner, there's a link to "All apps" so you can access every application and program installed on your computer.

Also, there's a "Power" button on the new Start menu, which will let you quickly put your computer to sleep, shut it down, restart, and hibernate (when applicable).

At the top of the Start menu, you can click your user icon or photo and it will give you options to change your account settings, lock the machine, or sign out of your account.

Finally, on a related note, if you want to change the color of your Start menu, then you can do so in that same Personalization group by selecting the "Color" options.

At the bottom of these options, you can turn off coloring on the Start menu, taskbar, and action center. You can also turn transparencies on or off, which will likely give you a little performance boost if it is an older system, or you just want to wring every last bit of speed out of it.

The new Start menu is a great compromise between the old style Windows 7 Start and the Windows 8 full-screen Start feature. As you can see, it's pretty easy to use, navigate, and personalize to your heart's content.
Tomorrow we'll continue our exploration of the new Start menu by focusing on the live tiles, which as we pointed out earlier, can be resized, moved, and disabled to best suit your personal tastes.
If you have any questions or comments you would like to contribute, please leave your feedback in our discussion forum.