Windows 10 is out, so we're going from our Macs to PCs with daily regularity. While there are quite a few differences between them, nothing trips us up more than cut/copy/paste. Here is how to remap cut/copy/paste so they're the same on both platforms.
One of the hardest things to get used to when we go from Mac to Windows, or Windows to Mac is cut/copy/paste. On a Mac, this is accomplished using the "Command +" combination, while on Windows it's done through "Control +".
If you aren't using an Apple-branded keyboard, such as one with a Windows key, then that will double as the "Command" key on your Mac, however, Windows still uses "Control" as its modifier so while you may be used to using "Command" on your Mac, on Windows all that will typically do is open the Start menu.
Today we want to show you how to do some simple remapping on both your Mac and your Windows machine so that cut/copy/paste doesn't trip you up. Of course, this can be applied to all other keyboard shortcuts that use "Command" or "Control" as well.
On a Mac
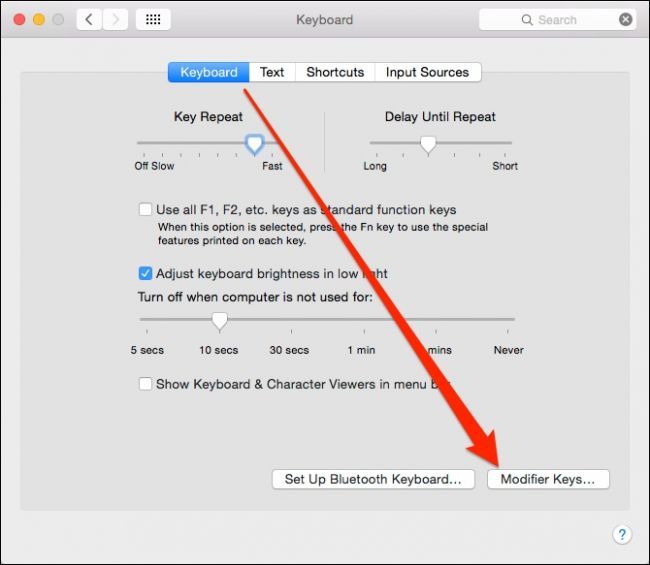
On a Mac, this is easy. We've talked at great length about just how configurable the Mac keyboard is and how you can change and assign keyboard shortcuts for a vast number of items. It's no different with modifier keys. Open the keyboard preferences and click the "Modifier Keys..." button.
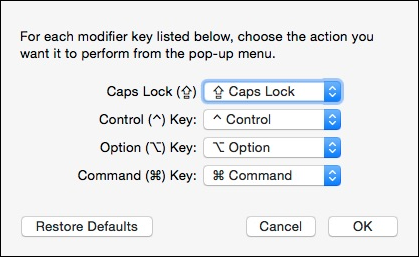
You can change the following four modifier keys: "Caps Lock", "Control", "Option", and "Command".
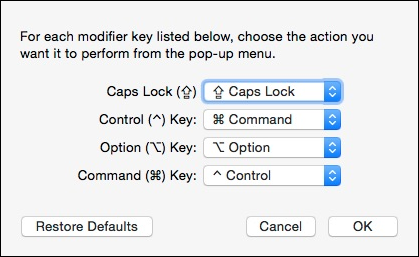
For our purposes, we're only going to modify "Control" to "Command" and "Command" to "Control".
Now, whenever we want to use any keyboard shortcut such as cut, copy, paste, or anything that previously required the "Command" key, we'll instead use "Control" instead to execute it.
On Windows
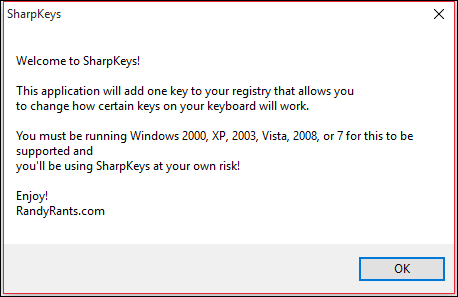
Windows doesn't provide a simple way to remap keys without modifying the registry, but you can use third-party software that will quickly get the job done. We recommend SharpKeys, which provides an easy-to-use interface and makes short work of everything.
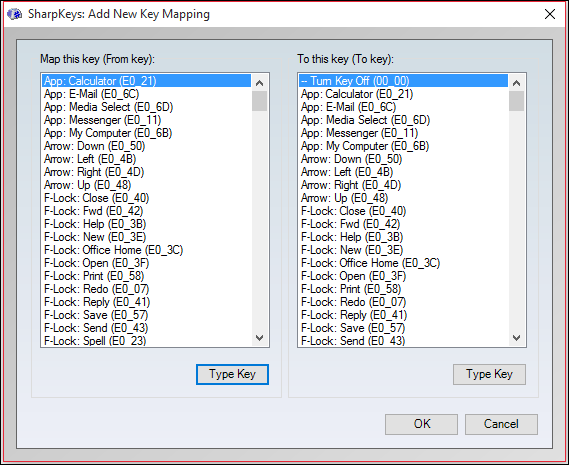
To remap your "Control" key to your "Windows" key, the easiest thing to do is click the "Type Key" button.
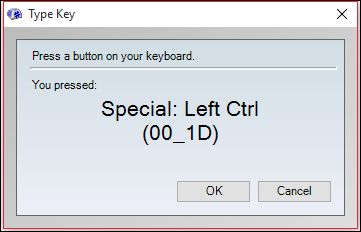
First, press the left "Control" button in the left column, then press the "Windows" key in the right column.
Now you see that we've remapped the left "Control" button to act as the "Windows" key.
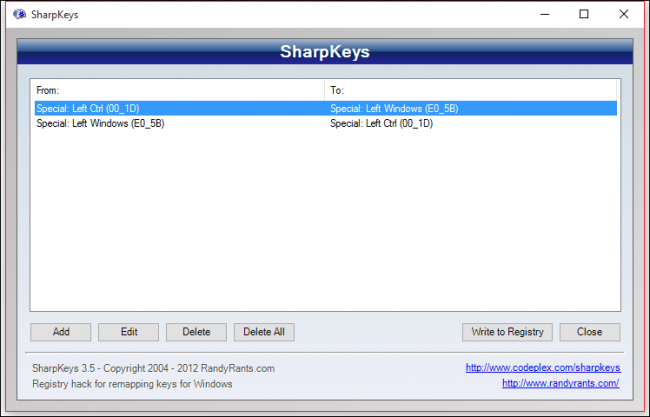
We're still not done. Even though the "Control" key has been remapped to act as our "Windows" key, we still need to remap the "Windows" key to the "Control" key. Otherwise, you will just have two keys which act like the "Windows" key.
The final result will look like the following screenshot.
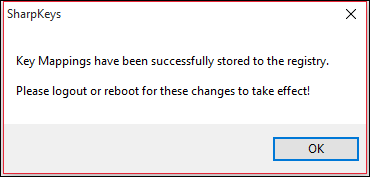
The last thing to do is to click the "Write to Registry" button. You will be required to log out of your account or restart the system.
Once your logout/login or restart, your new key mappings will take effect and you will be able to seamlessly go from Mac to PC or PC to Mac without annoying keyboard shortcut gaffes.
You can use SharpKeys to remap any keys you want, so if there are other ways you feel you can make your Windows keyboarding experience easier, then you now know how to do that. Remember, once you remap "Control" to "Windows", any and all shortcuts that depend upon it will be rely on the "Windows" key instead.
If you have any questions of comments you would like to contribute to this article, please leave your feedback in our discussion forum.


