Quick Links
It’s happened again. You were trying to answer a call while washing dishes, and your phone takes a dive straight into the sink. Getting water inside your phone is one of the most devastating ways to watch your mobile device bite the dust, but fear not, all is not lost just yet.
Personally, I know about this subject a little too well after dropping countless phones in toilets, sending them through the wash in a pair of pants, and getting drinks spilled on them while on a night out on the town.
But, by following these steps right after the device gets dunked, you can minimize your chance of sustaining any serious damage, and have your phone back up and working again within just three days.
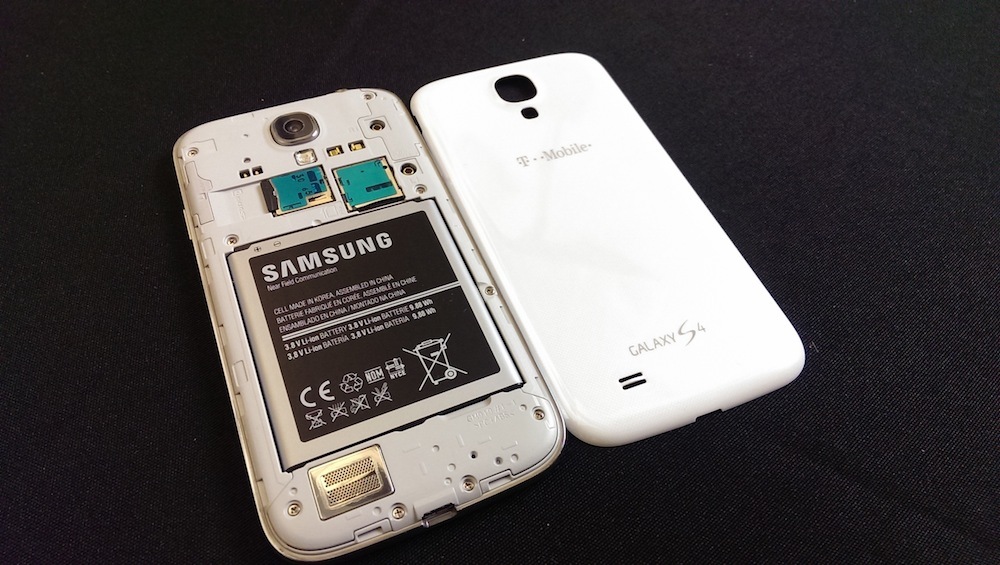
Step 1: Remove the Battery
The first, and most obvious step you’ll need to take within moments of your phone getting dunked is remove the battery. The whole reason a phone fries when it hits an excess patch of moisture is because the battery is sending power through the circuits, which then short out when the connections are bridged by the conductor of H2O.

This also goes for anything else that might keep the water from getting back out during the drying process. SIM card, SD card, headphones; if there’s a plugged hole, get it unplugged as soon as possible.
If your phone doesn’t have a removable battery, move onto the next step.
Step 2: Shut Down the Phone
Do not collect $200, do not pass GO. Every spare second is of the essence in this situation, because the longer your phone stays on, the greater the risk it will be damaged to the point of no return.

Shut down your immediately phone using the power button, and be sure it’s completely off before you move into the next phase of surgery.
Step 3: Take the Phone Apart
If you’re not comfortable with the idea of taking your phone apart on your own, skip to step 4.
If you’re someone like me who’s also had to replace the screen on their iPhone enough times that getting the case open is second nature by this point, start by unscrewing the backplate and getting the logic board out in open air.
Note: opening an iPhone is going to void the warranty. If you have a protection plan, you probably shouldn't open the phone.

iPhones are particularly great in this department because the two main connectors between the logic board and the battery pop right off in a single motion.
Step 4: Blast With Compressed Air
Regardless of whether your phone is in two pieces or still stuck together as one at this point, the next part of this process involves using a can of compressed air to clean out every nook and cranny possible.
If the phone is opened, blow air into the logic board, between the screen, and around the battery. Closed phones should be blasted through any open holes in the case, including the speaker ports, microphone, charging dock and earpiece.
The charging port is where you should focus most of your attention, as it has the closest proximity to the battery compartment and will give you the most amount of space to move the nozzle around from left to right inside.
Step 5: When in Doubt, a Hair Dryer Will Do
If you don’t have a can of compressed air on hand (though we recommend you try to pick a few up just in case of such an emergency), a hair dryer will work almost just as well. Be sure NOT to turn the settings on to any kind of heat -- only use cool air.

Thought it may sound counter-intuitive, the act of heating up any water trapped inside too quickly will cause the components to swell, and steam to release in some of the last places you want it to go.
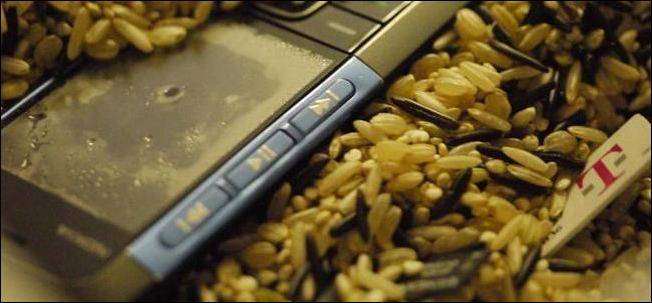
Step 6: Submerge in Rice, Quinoa, or Couscous
Finally, we come to the most critical step of all. The one that no matter if you used compressed air or a hair dryer, popped the battery out or otherwise, is your best hope for rescuing your device: stick it into some rice.
Editor's Note: this works because rice acts as a (weak) desiccant, which pulls moisture out of the air, which means it will slowly pull the moisture out of the phone. If you want a stronger solution that will pull the moisture out of the phone more quickly (and be way more reliable), look into getting an iFixit Thirsty Bag.

A common household item that most people are likely to have stored somewhere in their pantry, you’ll need about half a pound to a pound for this trick to work effectively. First, take the rice out of its packaging and put it into a tupperware container that can maintain an airtight seal.
Next, completely submerge your phone in the rice (we’ve also heard couscous and quinoa work well for this process), and stick a lid on the container after burping out any excess air. This is what helps to pull the water out of the phone and into the surrounding grains, so the more air you can get out, the better.
After that, you’re going to need to wait at least 72 hours before even thinking about trying to turn the device back on.
Some gurus will say it only needs 36 hours, but in testing it’s been proven that the longer you wait before booting anything back up, the better your chances of getting your phone back into working order without losing any of the precious data contained inside.
This is the step that takes the most patience and pure will, but if you can pull it off, the rewards are definitely worth the wait.
Step 7: Hope and Pray
Once the three day grace period has elapsed, pull the phone out of the container. Carefully check every part of the device to ensure that there’s no excess water left (this can include giving it a slight shake downward to see if anything drops out of the charging port or speaker slots), and once you’ve verified it’s dry as a bone, pop the battery back in, cross your fingers, and push the power button.
If all went according to plan the phone should boot right back up, and it’ll be like that plunge into the pool never even happened in the first place.
Bonus Tip: Buy a Water Resistant Phone (Or Waterproof Your Phone)
If your phone is safe and sound, or if you just rescued your phone, you should really consider waterproofing your phone before disaster strikes again.
The easiest thing to do is buy a waterproof case, but there are other steps that you can take. Be sure to read our entire article on waterproofing your current phone before doing anything else.
If you are in the market for a new phone, you also have other options. These days, waterproof smartphones aren’t just a luxury left for military personnel or professionals working out in the field. Devices like the Xperia M4 Aqua, HTC’s Desire Eye, and the Samsung Galaxy S5 all have an IPX7 rating, which means they can be completely submerged in water down to one meter for upwards of 30 minutes at a time.

Somewhat surprisingly, however, Samsung actually took a step back this year with the release of the Galaxy S6, turning what used to be a fully waterproof device back into a fragile piece of hardware that could explode at the slightest sign of rain.
Even so, the above devices are all great if you spend a lot of days outdoors and worry about plopping your phone in a puddle, or just want something that won’t need to get replaced the next time you’re trying to water the garden and talk to Grandma at the same time.
Image Credit: Flickr/Mark Ou, Wikimedia, Flickr/TechStage, Wikimedia, Flickr/Kārlis Dambrāns, Pexels, Gazelle Flickr/Gwyn Fisher