The Track Changes feature in Word is a useful feature for keeping track of the changes you make to a document especially when working collaboratively on a document with others. You may sometimes need to copy the text to another document retaining the tracked changes.
This seems simple, but it's more than just copying and pasting the text. To begin select the text with the changes in your document.

The first key to keeping the tracked changes with the text being copied is to make sure the "Track Changes" feature is turned off. To do this, click the "Review" tab on the ribbon. If the "Track Changes" button in the "Tracking" section is highlighted in blue, the "Track Changes" feature is on. Click the lower-half of the "Track Changes" button and select "Track Changes" from the drop-down menu. The "Track Changes" button should not be highlighted when the feature is off.
NOTE: If you don't turn off the "Track Changes" feature, Word assumes you want to copy the text as if all the changes in the selection were accepted. The changes will be integrated into the text.

Press "Ctrl + C" to copy the text. Now, we'll create a new document into which we will paste the copied text. Click the "File" tab.
NOTE: You can also paste the text into any existing Word document.
Click the "File" tab.

Click "New" in the list of items on the left.

On the "New" screen, click the "Blank document" icon.

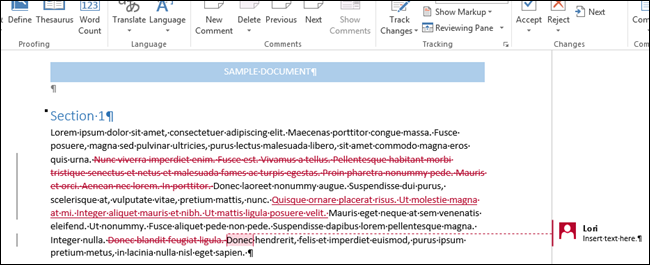
The second key to successfully preserving the tracked changes in your copied text is to make sure "Track Changes" is OFF in the new (or other) document. Then, press "Ctrl + V" to pasted the text with the tracked changes.

You can also use the Spike in Word to copy text. This is especially useful if you're copying multiple, non-contiguous blocks of text and/or images.