Quick Links
On January 21, Microsoft officially announced the new features that would be included in Windows 10. While you’ll have to wait for the release to enjoy most of the new features, you can take advantage of the new Windows 10 Start menu today.
UPDATE
It appears that many antivirus programs are listing this as an adware. In our testing we didn't find ads... but we're going to pull the article from the newsletter just to be safe.
It's not a very high quality app anyway, so you aren't missing much. We shouldn't have written this article in the first place.
We’ve previously shown you how to get the classic Start menu back in Windows 8, including the use of a free tool called ViStart. We will be using ViStart in this article with some additional skins to create a Windows 10-like Start menu. Download ViStart and run the program. It doesn’t install like other programs. The executable file you download is also the file you use to run the program. The first time you run the program, it creates a “ViStart” directory in the “AppData” folder, which we will access later to install the Windows 10 Start menu skins.
If you opened ViStart after installing it, right-click the ViStart icon that was added to the system tray and select “Exit” to close the program.

NOTE: You may notice that when you exited ViStart, the Start orb on the Taskbar disappeared. This seems to be a minor bug. You can still access the Start screen by pressing the Windows key. You can get the Start orb back by logging out and back in or by restarting your computer.

Download the Windows 10 Start menu skins (a .rar file) to the same directory as the executable file. You can save it wherever you want to; it’s just easier to keep track of if it’s in the same directory as the executable file.

Unzip the .rar file using an extraction program that can handle .rar files, such as 7-Zip.

Open the “Windows10 startmenu” directory you extracted.

Select the four directories in the “Windows10 startmenu” directory and copy them.

Press the Windows key + R to open the “Run” dialog box. Type the following line into the “Open” edit box and click “OK.”
%apdata%\ViStart\_skins

Paste the four directories you copied into the “_skins” directory.

Go back to the directory containing the downloaded skins you previously copied and copy the “English.xml” file.

Open the “Languages” directory by pressing the Windows key + R to open the “Run” dialog box. Type the following line into the “Open” edit box and click “OK.”
%apdata%\ViStart\Languages

We recommend you rename the original version of the “English.xml” file before copying the new file into this directory. To do this, click twice slowly (not a quick double-click) on the file name, making it editable, and change the file name.
NOTE: You can also press F2 to rename the file.

Once you’ve renamed the original file, copy the new one into the directory.

To make the Start menu look like Windows 10, right-click on the ViStart icon in the system tray and select “Options” from the popup menu.

The “Control Panel” dialog box displays. On the “Style” screen, select a style from the “Which start menu would you like?” drop-down list. The “Windows10” options are labeled as such.

You can also select the style of the Start orb you want from the “What start orb would you like?” drop-down list.

Click “Configure” to access a screen allowing you to specify what you want to see on the Start menu.

The “Desktop” screen allows you to specify how the Start button and the Windows key behaves, whether to show ViStart on the system tray and start ViStart when Windows starts. You can also change how the Windows 8 features work. Note that if you change anything in the “How should the Windows 8 features work” section, you must restart Windows to have the changes take effect.

The “About” screen tells you a bit about ViStart and lists the currently chosen skin. You can also check for updates to the current skin.

To close the “Control Panel” dialog box, click the “X” button in the upper-right corner.

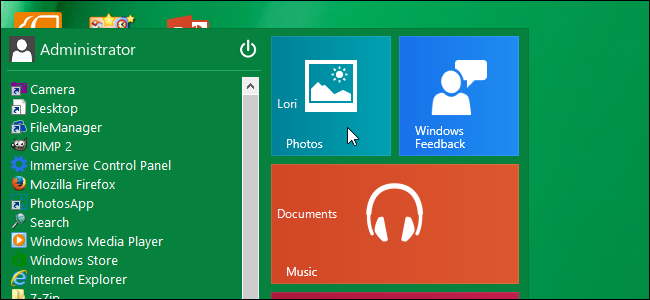
Now, you have a Windows 10-like Start menu, combining elements of the classic Start menu and the Windows 8 Start screen.

You can also install ViStart and these Windows 10 skins in Windows 7 and even XP.