Quick Links
Outlook isn’t much use if you don’t have contacts. Sure, you can enter email addresses as you go, but that’s time-consuming and error-prone. It’s better to have your contacts already in Outlook, so you can dash off a quick message in just a few clicks.
In a recent article, we discussed how to get started using Outlook, and today we want to extend that to include working with contacts. Your contacts will be the center of your Outlook experience, those with whom you correspond and how you use the application.
As you might expect, you can do a lot of contact management with Outlook, and having an address book set up before you start using it makes a lot of sense.
Creating an Address Book
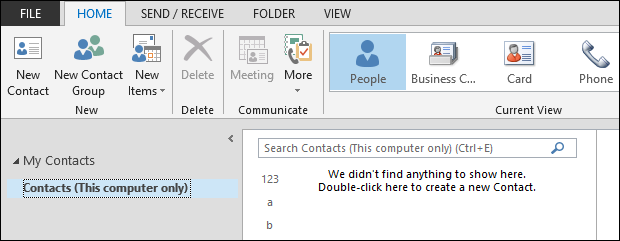
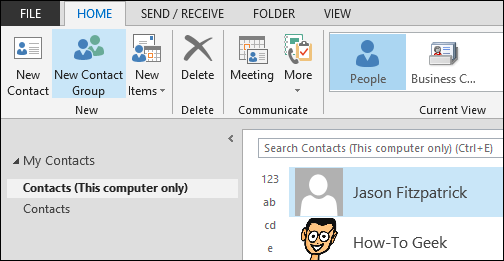
To begin managing your contacts, the first thing you want to do is open the People mode so you can get down to work. There’s quite a few ways to add contacts to your address book. In the beginning, you’re likely to import your address book from another source like your webmail or other e-mail program.
Note, for each email account you have, you’re going to have an address book. In this particular situation, we have a local address book for our local Outlook data file, and we have another one associated with our email account.
In any event, let’s cover the basics so that if you don’t have an address book to import, you can start adding contacts manually. In the following screenshot we see a portion of our new address book, which is completely empty, for now.
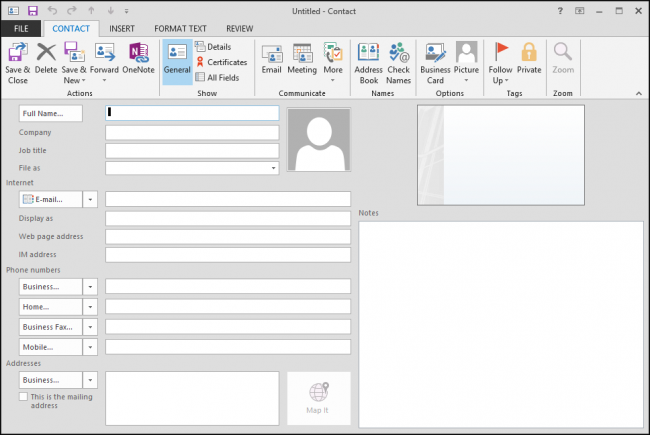
To start, just click the “New Contact” button and it will open a new contact window. The first thing that may jump out at you is just how busy it appears but fear not, if you look past the many features on the Ribbon, you’ll see that it’s a pretty standard, run-of-the-mill contacts form.
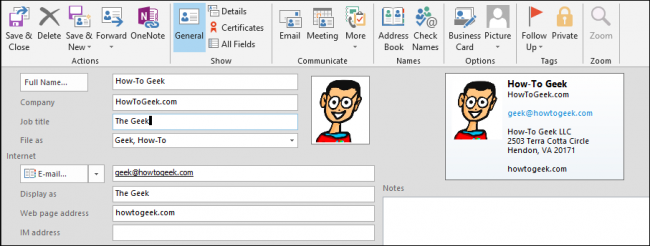
Let’s cut to the chase then and make a contact for How-To Geek by filling in the appropriate values. You can also add an image, which is unnecessary, but still a nice touch to the bland, boring address book.
After you’re done entering your contact or contacts, you will want to either click “Save & Close” or you can click “Save & New” to generate another contact. Let’s do that. We have a choice between creating a whole new contact or a new contact for the same company.
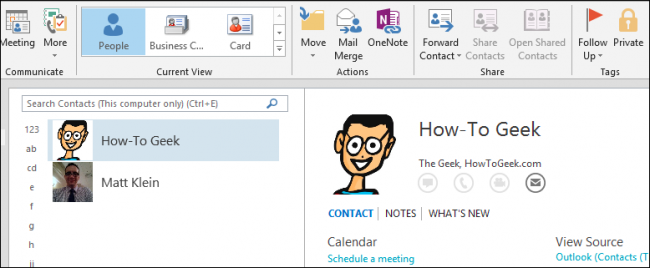
In this case, we’ll choose the latter to save time on typing, after which we’ll click “Save & Close” to reveal our new address book entries.
Not bad, we already have two contacts we can email but, man, is this time-consuming. It would be a lot easier if we could move contact information from another source to Outlook.
If you use a webmail service or another, your contacts are most likely there and will need to be imported into Outlook. If you want to enter each contact one by one, then you’re most certainly welcome to do so, but we recommend importing your main contacts list, whether that is from Thunderbird, or Gmail, or another email service.
Importing and Exporting Contact Records
Regardless of whether you use Gmail or Yahoo Mail!, or you have an email account from 1997 that you've carefully kept and maintained, contacts and all, inevitably you may need to put contacts into your Outlook contacts en masse.
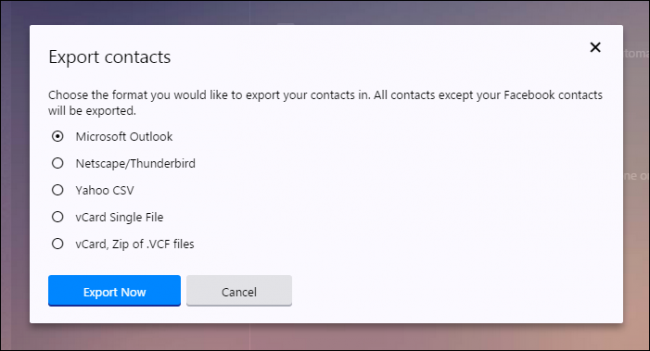
To do this, you can export contacts from another source and then import them into Outlook. Normally this is easily accomplished by simply accessing the settings or options from your email account or client and then choosing the export contacts option.
Normally then, all you need to do is then import them into Outlook. This is a fairly straightforward process, and it will be similar in most email applications. We recommend you read our article, which explains how to export and import contacts into Outlook, and vice-versa.
vCard? What’s a vCard?
You might have heard vCards (Virtual Card File or .VCF), maybe you’ve even received one or use one. vCards, are a standard electronic business card format that you can exchange with others such as through an email signature or attachment.
Regardless, there are several ways that you can handle vCards in Outlook. The most likely scenario is where you might need to import a contact from or export to a vCard. How-To Geek has a complete description of this process, which will quickly bring you up to speed on that.
Sometimes, you might have many vCards stored in a single vCard file. If you try to convert this file however, only the first vCard in the file will be imported. In order to overcome this limitation, you first need to convert to a .CSV file and then import that into Outlook. We recommend you read this article for a complete description of that process.
Finally, you can export all your contacts to individual vCards or one single master vCard, as described in the previous paragraph. Once again, we have a great little tutorial on how to do this, so with that you should be up to speed on how to get you vCards in and out of Outlook with relative ease.
Create and Manage Contact Groups
Let’s discuss groups now since being able to quickly dash off a message to a select group of souls assures you don’t forget to include anyone and saves you from typing each name in the To: field.
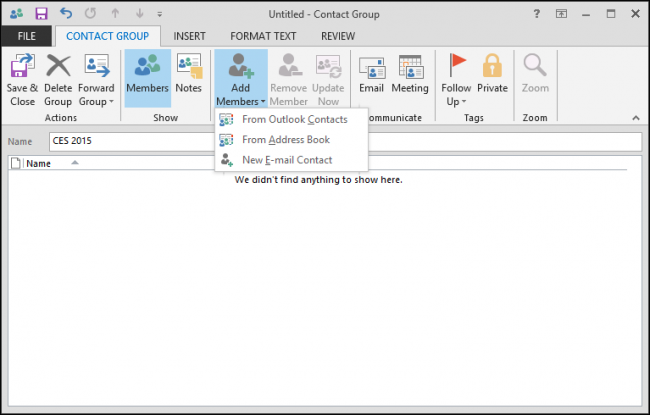
To set up a contact group, click on “New Contact Group” on the Ribbon.
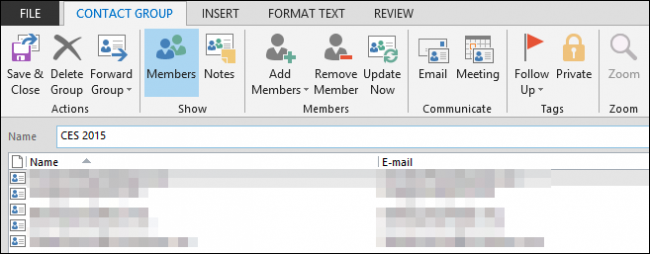
Once open, you will need to first decide what you want to call your group (here we name ours “CES 2015”) and then click “Add Members” and select “From Outlook Contacts.” You can also create a new contact on the fly, or choose another address book, such as if you wanted to include folks from your company’s directory.
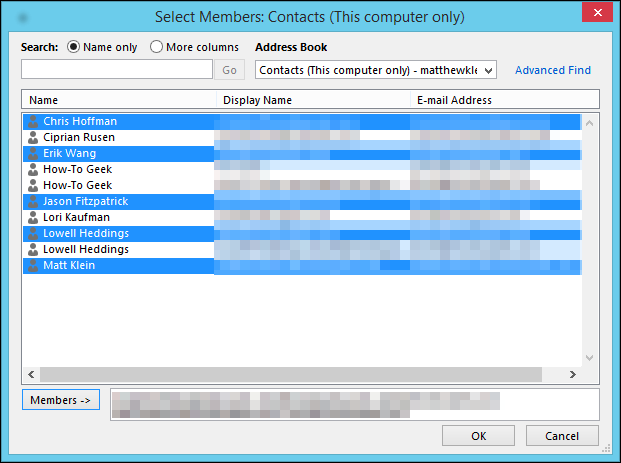
From the list, we select our group members. Remember, you can select members by holding "CTRL" and left-clicking each member. Regardless, whenever you want to add new members, you select the name or names and click the “Members ->” button, which will add them to the group.
When you’re finished, click “OK.”
You’ll be returned to the group management screen, where you can review the members of your new group and make other changes. For example, you can forward the group as a Vcard or Outlook contact, add notes about the group, email the entire group, or create a meeting with only those group members.
In our case, we’re just going to click “Save & Close” to officially create the group and return to the main Outlook window. We see now our new group in our contacts list, denoted by group icon. To the right, you can see the group’s member and there’s icons to which to perform actions. In this example, only the e-mail icon is available, as well as the “Edit” button.
You should note that the quickest way to email a group is to simply type the name of it in the To: field, so in this case, we could type "CES 2015" and Outlook would know to send the message to everyone in that group.
People Options
If you click on "File -> Options", you can configure Outlook in a number of ways in several different categories.
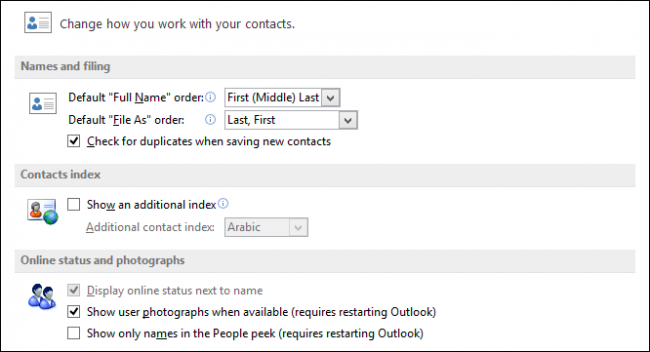
Here are your people options. Unlike other categories in the Outlook options, the People options are few and pretty easy to sort out.
The options you’ll find here will let you decide how names are filed, whether to show an additional index, and to display online statuses and photographs.
Managing Outlook contacts is fairly simple, but as you've seen, you can do a great deal more to them to keep them properly maintained. It does lend a lot more to round out your Outlook experience if you've got more information in your contacts than just a name and email address.
That said, if you're still partial to using something like Gmail as your primary email provider, then you can still use Outlook to help you manage your contacts, while keeping them synced with your Gmail account.

