Quick Links
Key Takeaways
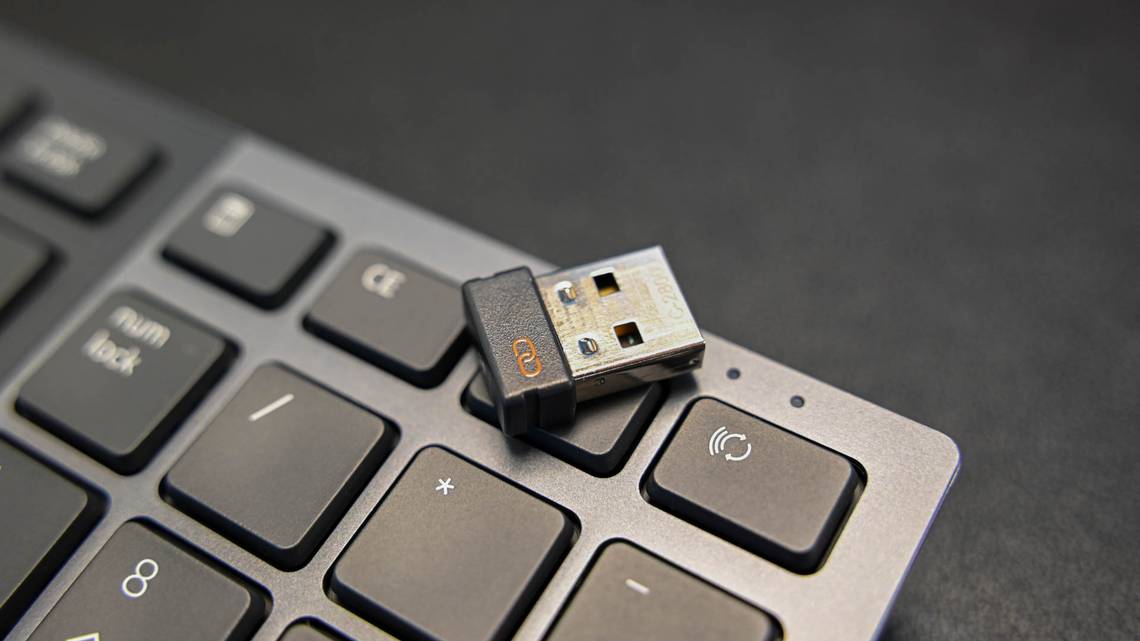
You can add Bluetooth to any Windows PC by plugging a USB dongle that costs around $15. All you need is a free USB port. This dongle can upgrade your PC to use newer versions of Bluetooth, too.
Although the majority of laptops—and even desktops—now come with Bluetooth support, some of us still need Bluetooth upgrades. If you're rocking a PC without Bluetooth support, don't fret. We'll show you how to add Bluetooth support to any Windows computer—easily and cheaply.
Why Would I Want to Add Bluetooth?
While you can get by just fine without Bluetooth support on your computer (especially if you're using a desktop) there are tens of thousands of peripherals and accessories that require—or would be made more convenient by—Bluetooth.
You could, for example, run an auxiliary audio cable from your computer to some of Bluetooth speakers we reviewed in our Bluetooth speaker guide, but it would make your speaker a lot more portable and convenient to pipe in the music over Bluetooth so you could retain the ability to move it anywhere in your office. Bluetooth is also handy when using wireless headsets, bluetooth trackers, game controllers, mice, keyboards, and other peripherals.
Even if you already have Bluetooth on your laptop or desktop PC, you may still want to follow along with this article. Why? Because depending on the age of your machine, it might only have Bluetooth 4.0 or older. Not only will the methods outlined in this article help you add Bluetooth to a computer that doesn't have it, but they will also help you add an updated Bluetooth connection to a computer with older Bluetooth hardware. Who knew upgrading a Bluetooth 4.2 connection to a Bluetooth 5.0 connection would be so easy and inexpensive? If only every computer upgrade were so cheap and plug-and-play.
See If Your Computer Already Has Bluetooth
Before we proceed, we'd encourage you to give your computer a double check for Bluetooth radios. If you have a very old laptop or computer, you're probably correct in assuming that you don't have Bluetooth built-in.
However, if you have a newer laptop, it's practically a given that you have Bluetooth. Similarly, it used to be a non-existent feature on desktop PCs, but in the last few years, many desktops have begun shipping with Bluetooth radios. Here are some quick ways to see if your computer already has Bluetooth.
And remember, even if you have Bluetooth, but it's an older version you want to upgrade, that's no problem. We can upgrade it very easily in the next section of this article.
Open the Bluetooth Devices Menu
On Windows 10 and Windows 11, the fastest way to see if Bluetooth is installed and configured is simply opening up the Bluetooth devices menu. From the Start Menu search box, just type "Bluetooth" and select "Bluetooth and other devices settings" to jump there.

For more information, check out our guides to using Bluetooth on Windows 10 and activating Bluetooth on Windows 11.
If you see something like the screenshot above where Bluetooth is already on and the "Add device" button is ready, you can jump right to the end of the article to add a device—unless, of course, you're here to upgrade your Bluetooth connection.
Check the Windows "Network Connections" for Bluetooth
It's simple to check for evidence of Bluetooth in Windows. You can check for Bluetooth by heading to Control Panel > Network and Internet > Network Connections.
This is a handy way to check because whether you're on Windows 7, Windows 8, Windows 10, or Windows 11, the Bluetooth connection will appear in the Network Connections menu.
If there is a properly installed and configured Bluetooth radio, you'll see an entry for "Bluetooth Network Connection" alongside other network connections like Ethernet and Wi-Fi.

Don't worry if it says "Not connected" under the Bluetooth entry. That simply indicates that there are presently no Bluetooth devices connected to your computer, not that there is a problem with the Bluetooth connection.
Check the Windows Device Manager
Alternatively, you can open up Device Manager. Like the previous method, this works on every version of Windows, too.
Just use the Start Menu search for "Device Manager" and then look for a "Bluetooth" entry. Device Manager will show you if your PC has a Bluetooth device, even if it's not correctly set up.

We also suggest double-checking the stats on your PC just to be sure. Although unlikely, the hardware vendor behind your PC's hardware may use a specialty driver or some other tool that you need to download to enable the Bluetooth connection. A little poking around with Google will reveal if you have the proper hardware in the first place and if you need any special driver, BIOS, or other updates.
How to Add Bluetooth to Your PC
If you've found that your PC does not have Bluetooth built-in, then you'll need to add it. And if you found that your PC does have Bluetooth, but it's old enough that you want to upgrade it for a better experience with Bluetooth headphones and accessories, you'll need an upgrade.
The good news is that it's easy to do, and you won't need to spend much on the project. Better yet, the difference between adding Bluetooth to a computer that doesn't have it and upgrading the existing Bluetooth is just a single additional step.
Step One: Buy a USB Bluetooth Dongle
You don't need a whole lot to follow along with this tutorial. Once you've determined that your computer is definitely in need of a Bluetooth radio (and not just a driver update), it's time to check that you have a free USB port. If you don't, and there's no making room because you need all your current ports, you should consider getting a quality USB hub or a USB expansion card.
With a free USB port in hand, the only other thing you need is a USB Bluetooth adapter. In the original version of this article, we recommended the popular Kinivo BTD-400. At the time, there were no Bluetooth 5.0 dongles on the market.
Now, however, you can pick up a really good Bluetooth 5.0 dongle like this TP-Link USB Bluetooth 5.0 Adapter. For the same price as a Bluetooth 4.0 dongle, you get all the features of Bluetooth 5.0 (and backward compatibility with all the previous versions of Bluetooth).

TP-Link USB Bluetooth 5.0 Adapter
This tiny USB dongle is perfect for adding Bluetooth 5.0 support to your Windows PC. It supports Windows 7, 8.1, 10, and 11. On Windows 8.1 and above, you get plug and play instant installation too.
There are other ways to approach the problem, but the majority of them are quite impractical compared to just popping a USB adapter into an open USB port.
You could, for example, use up your laptop's mini PCI slot with a laptop Bluetooth/Wi-Fi module, but that's a lot of hassle. One reason you might want to go the mini PCI route is if you really don't want to give up a USB port on a laptop and don't want to carry around a USB hub.
On the desktop side, the only reason we can see for not using the USB-based solution is if you're explicitly in the market for a Wi-Fi PCI card for a desktop computer since many Wi-Fi PCI cards come with Bluetooth built-in. If you're undertaking either option, check out our guide to upgrading or replacing the Wi-Fi card in your PC or laptop. And if you do, don't forget to use an antenna extender to boost the Wi-Fi reception of your PC card.
Step Two: Install the Bluetooth Dongle
When installing the USB dongle on Windows 8.1, Windows 10, or Windows 11, the process is dead simple: just plug it in. Windows includes the basic Broadcom Bluetooth drivers required by the dongle and will install them automatically when it recognizes the new device.
If you're installing it on an earlier version of Windows or your USB dongle is not recognized automatically, you'll need to install the Bluetooth drivers. You'll know your PC requires the drivers if the Device Manager pane looks like this after you plug in the dongle.

Depending on the version of Windows you're running, the "missing" Bluetooth dongle or card will either appear as a generic entry in the "Other Devices" section of the Device Manager or it will be identified as a Bluetooth radio but labeled "Generic Bluetooth Radio" because Windows can identify what kind of hardware it is but can't initialize it.
In either case, you must visit the manufacturer's site and download the appropriate drivers. You can download the drivers from the two USB dongles we mentioned above by visiting either the Kinivo driver page or the TP-Link driver page. Download the version for your operating system (here's how to see if you're running 32-bit or 64-bit Windows), run the installer, and you're good to go.
Step Three: If Upgrading, Disable the Old Bluetooth Device
If you're adding Bluetooth to a computer that doesn't have Bluetooth or the old Bluetooth was a removable device (e.g., you're swapping out one USB dongle for another), then you can skip this step.
But if you are adding a Bluetooth 5.0 dongle or an upgraded card to a computer with an existing Bluetooth radio that you can't remove, you need to disable it.
Locate the Bluetooth radio you wish to disable in the Windows Device Manager, right-click on it, and select "Disable device."

It's important to select "Disable device" and not "Uninstall Device," as you don't want Windows to fuss over detecting the device and attempting to reinstall it. You want Windows to acknowledge the device and ignore it.
It's also useful to leave it installed, so it's ready to go on the off chance you need it. Let's say, for example, you realize a half hour into a flight that your laptop is missing the updated Bluetooth dongle. If you left everything installed, you can pop into the Device Manager and turn on the old Bluetooth radio. Because, hey, Bluetooth 4.0 might not be cutting edge these days, but old Bluetooth is better than no Bluetooth.
Step Four: Pair Your Devices
Now that you have the dongle installed, you're ready to pair a device. Now is a great time to turn the device on and ensure it is in pairing mode. (We're not going to say that every Bluetooth frustration we've ever had was related to failing to notice a device wasn't in pairing mode, but it's up there on the list of reasons.)
After inserting the dongle (and with the appropriate drivers installed), a Bluetooth icon should appear in the system tray, as seen in the screenshot below. Right-click the icon and choose "Add a Bluetooth Device" from the context menu. (You can also type "Bluetooth" in the Windows Start Menu search to jump to the Bluetooth menu, too.)

The specific steps you see next will vary based on which version of Windows you're using, but it's all pretty straightforward, and the general verbiage hasn't changed much over the years.
For a closer look at the specifics of adding Bluetooth devices under different versions of Windows check out our guides to adding Bluetooth to Windows 10 or using Bluetooth on Windows 11.
Once you've selected the device you wish to add to your Windows PC, the connection should be instantaneous (although on older computers running older versions of Windows, don't be surprised if the little icon bounces back and forth for up to 30 seconds during this process).
You can manage your Bluetooth devices by accessing the Bluetooth menu via the system tray (as we did a moment ago) or navigating to Control Panel > Hardware and Sound > View Devices and Printers. Either way, you should be able to see (and interact with) both your Bluetooth dongle and any attached Bluetooth devices.
That's all there is to it! $15, one USB port, a virtually painless installation process, and now your computer has Bluetooth connectivity. You can finally pair your favorite Bluetooth headphones with your PC.