Quick Links
By default a fresh Windows 8 installation prompts you to create a synchronized cloud-enabled login. While there are distinct perks to Microsoft's live login system, sometimes you just want to keep things simple and local. Read on as we show you how to banish the cloud-based login for a traditional local login.
Dear How-To Geek,
While configuring my new computer (which has Windows 8 on it) I seem to have created some sort of synchronized-to-Microsft's-servers login. I really didn't want to create it, but it looked like I had no other choice when I set the computer up. On all my old versions of Windows all the way back to the early days of the OS, I always had just a plain old login like John + a password. I don't like this whole John + somecrazyemail (because all the reasonable @live.com emails were already taken) + a password business.
How do I get a plain jane local login back? I tried searching for a solution and I found your great article explaining the differences between the cloud login and the local login, but I'm not clear how to banish the cloud login and get back to using a regular login again.
Sincerely,
Local Login 4 Life
We can understand your frustration. The way the setup process is laid out it makes it look like setting up a "Microsoft account" to enable syncing and Windows Store purchases is the only way to do things.
In order to get back to where you'd like to be (no cloud-based login, only a local login) we'll need to perform a few simple housekeeping steps. Let's break it down into the individual steps.
Creating the Local User
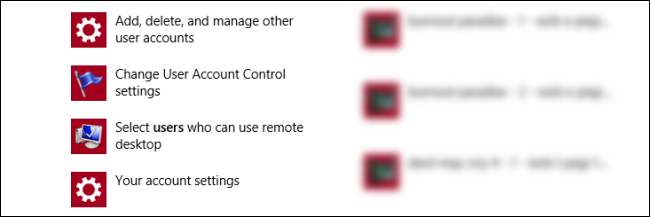
First and foremost, we need to create a new local account. Log into your Windows 8 computer using the Microsoft Account created during the installation/configuration process. Move the cursor up to the upper right corner to reveal the charm bar/search icon and click on the search icon. Search for "users' to bring up the user account options.
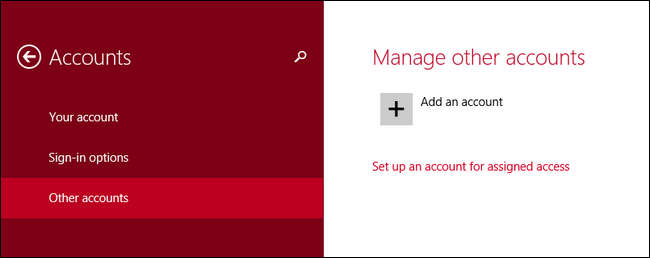
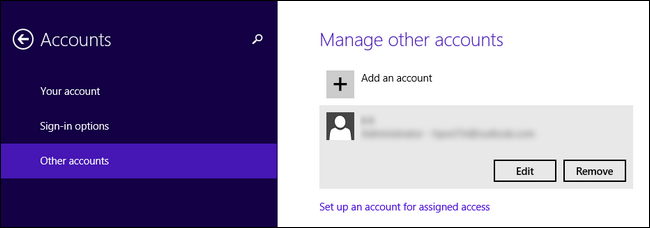
The first search result will be "Add, Delete, and manage other users accounts". Click on that option. This will take you to the Accounts section like so:
Select, Other Account. Click "Add an account".
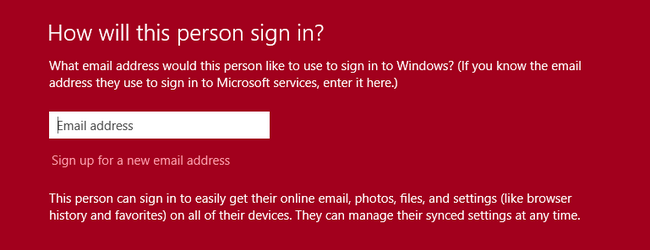
This is the part where things get tricky. At the top of the screen, it makes it seem like you must provide an email or create a new one:
But if you look at the bottom of the screen and read fine print, you can proceed without an email address:
Click on "Sign in without a Microsoft account (not recommended)" and click next. Don't think you're done refusing to sign up for an account yet, though:
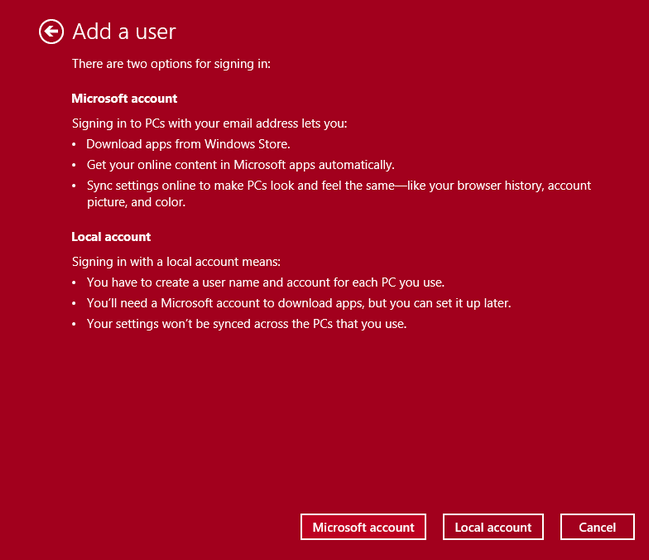
They'll bug you one more time to sign up for a Microsoft Account. Read the summary if you must, but make sure to click the "Local account" button to start the process of creating a true local account.
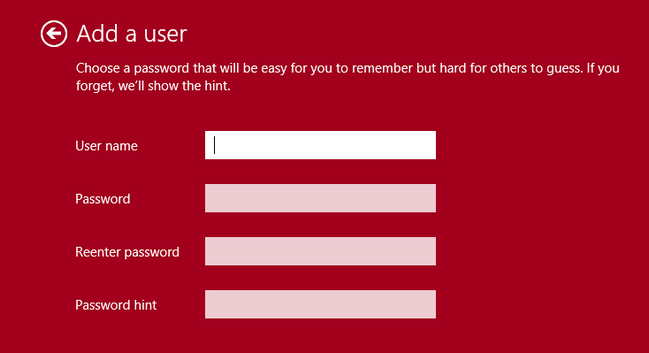
On the next screen, you'll see a pretty familiar process, a request for a username, password, password check, and a password hint:
Enter all that information and click Next. In the next step you'll see a confirmation for the new user. Click Finish and you're all done. You now have a new local user account with no ties to the Microsoft Account cloud-based system.
Elevating the Local User's Privileges
Before we begin the process of banishing the old Microsoft Account, we need to give our newly minted local account administrative privilege. In the last step, after you clicked Finish, it kicked you back to the Accounts screen. Click on the "Other accounts" option on the sidebar and then double click on the entry for the new local user account you just created. Click the "Edit" button that appears when you do so.
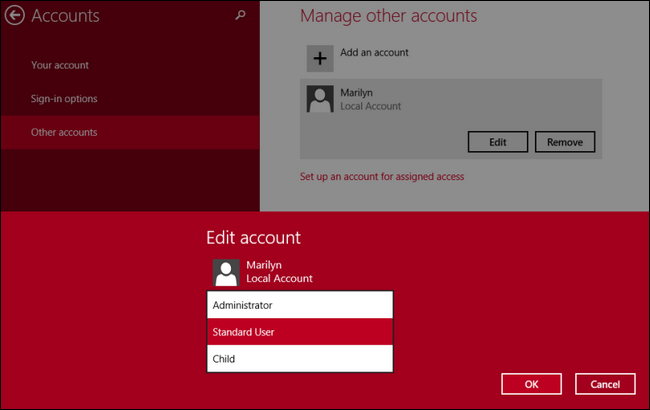
Beneath the user account name is a drop down menu where you can toggle the privileges:
By default the account is set to "Standard User", change it to "Administrator". Click OK.
Note: It's good security practice to have a separate administrative account for administrative tasks and a daily-use account set as a standard user, even if you're the only one using the computer. To follow that advice, you should create two new local-user accounts, such as Bill and Admin wherein Bill is the standard user and Admin is the elevated user. For the purposes of this tutorial, however, we're outright replacing the Microsoft Account (which has admin privileges) with an equivalent local user account (which now also has admin privileges).
After clicking OK, you'll be back at the Accounts screen. At this point we have a new user account (the local account you want) with administrative privileges.
Removing the Microsoft Account
After completing the previous steps of setting up a local user account and elevating that account's privileges, it's time to remove the old account.
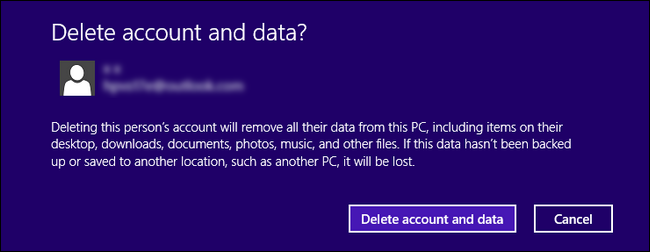
The old Microsoft Account will be removed and all data associated with it will vanish. This means anything in My Documents, any bookmarks, any data individualized to that account, etc. will be removed. If you just set the computer up and you're following this tutorial to get rid of the Microsoft Account, there isn't much data to lose. If you're following along after having used the Microsoft Account for an extended period of time you must backup your data first!
Once you've confirmed you have no data to backup (or that your data is already backed up), log out of the Microsoft Account you're working from. Press WinKey+L to quickly access the login screen and switch to the the new local user.
Login to the local user account and repeat the process that we started the tutorial with. Use the search charge to search for "users", click on "Add, Delete, and manage other users accounts". Now that you're logged into the local user account, the Microsoft Account will appear under "Other accounts" click on that category and then double click on the entry for the Microsoft Account:
Click the Remove button.
As we warned earlier in this section, all data associated with the account will be removed. If you've backed everything up (or have nothing to backup), click "Delete account and data". If you still have data to backup, hit cancel and then repeat the steps in this section when you're ready.
At this point, you've finished the process and the Microsoft Account has been removed, leaving only your local user account. The only remains of the old Microsoft Account, if any remain, may be found in the "Network Locations" section of the "This PC" explorer listing on any of your Windows 8 computers (including the one you're currently working on). A network location is created for each user account, so if you see any vestige of the old account in this section (e.g. a network location named someaddress@live.com (office-pc) instead of the name of your local user account, like John (office-pc) or similar), feel free to right click and delete the phantom entry.
That's all there is to it! By creating a brand new account and giving it the proper privileges, we were able to use it to remove the cloud-enabled account and switch the whole computer over to a local user system.

