Earlier this week, Steam released Family Options, their version of parental controls, for the Steam game client. Read on as we show you how to lock down adult games, online content, and purchasing options to make your Steam client kid-friendly.
Why Do I Want to Do This?

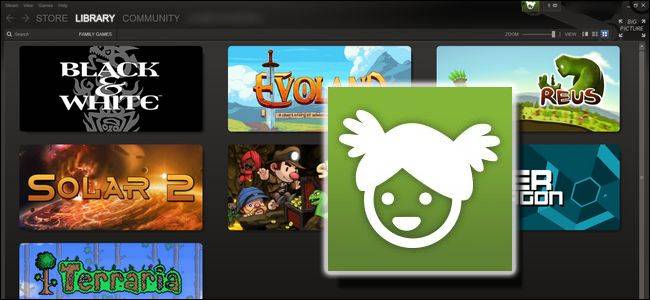
By default, when you launch the Steam client you have full access to everything: the Steam store, the complete game library of the current user, the Steam Community (online discussions), the profile of the current user, and all the settings. Just take a look at the screenshot above: not only are there a bunch of kid-inappropriate games we certainly wouldn't want our kids playing, but they can also (with just a few clicks) open the store and purchase things, hop into the Steam Community and talk with anyone, or otherwise mess around with settings and our content.
It's a less than ideal situation if you want to let your kids play the kid-friendly games in your Steam library. This less than ideal situation is, however, thankfully mended by the release of the Steam Family Options. Although the most obvious use of Steam Family Options is to lock down an adult's account so that only the kid-friendly content is accessible, we'd like to point out that it's also very useful for locking down Steam accounts that belong to children. Let's say you set up a Steam account for your child so that you two can play multiplayer Steam games together. Even though there's no objectionable game content in your child's Steam account, it's still nice to be able to lock down the account so that they can't access the Steam store or find themselves chatting with random people via the Steam communities and chat.
We've had the opportunity to beta-test Family Options and have been quite pleased with it. Let's take a tour of the setup process to show off how easy it is to lock down your Steam account.
Turning Family Options On

Launch your Steam client. If you haven't launched it in the last week or so, you'll have a client update waiting (which will enable the new options).
Note: Although we're using the Steam client for this tutorial (because it allows you to immediately test your changes and see the results), you can in fact log into your Steam account and, using the Family Options (found in the lower right hand column) make the same changes.
Once it has finished loading, navigate via the menu bar to Steam - >Settings. Within the Settings menu, select Family. At the top of the screen you'll see Family Options, as seen in the screenshot above. Click Manage Family Options.

The Family Options has two sections you can manage: Library Content and Online Content & Features. It defaults to the strictest settings: only games you choose (which, by default, is none of them) and no Online Content & Features.
We're going to configure the settings on the strictest level. We want to give the kids in our house access to the games we green light, but we don't want them to access the Steam store, the community generated content, to chat with anyone, or to mess around with our profiles. You can adjust the settings for your own family as you see fit. Once you have done so, click Continue.

On the next screen, seen above, you'll be prompted to select which games you want to include in the new Family mode. Once you've checked off all the games you want to share with your kids, click Continue.

Select a PIN. This is the key that will allow you to easily switch between Family mode and normal mode for adult gaming. They're not kidding about jotting it down, by the way. Use a PIN you won't forget, put it as a secure note in LastPass, or write it down. It's a huge pain to jump through the security hoops and unlock your client if you forget it. Select your pin and click Continue.

The final screen is a confirmation screen. After you see the screen above, go ahead and navigate around your Steam client to see how things look with the Family Options enabled. The first stop should be the Library to confirm the games you selected are displayed and, if you locked down any of the major categories, they're grayed out:

Not only is the selection of games reduced to only the kid-friendly ones we selected (no Metro 2033 or Left 4 Dead to be seen) but the Store, Community, and Profile navigation elements are darkened and inaccessible. At this point everything is locked down. Success!
Editing or Disabling Family Options

Obviously there will come a point where you want to edit the settings (such as when you purchase a new game and want to white list it for the kids) or to switch off the Family mode to play an adult game.
To do so, look for the Family Options icon located in the upper right hand side of the Steam client window (seen in the screenshot above). Click on the icon.

After entering your PIN, your Steam client window will refresh:

Everything will look exactly like it did when we started this tutorial, with the small edition of the Family Options icon (now red) seen in the screenshot above. After you're done gaming or editing the settings for Family Options mode, you can simply tap on that icon to lock the Steam client back down.
That's all there is to it! You can easily toggle the mode on and off, add more games to your kid-friendly white list, and rest easy knowing that you won't have to deal with your kids stumbling into a gory game.