The Signature Editor in Outlook 2013 allows you to create a custom signature from text, graphics, or business cards. We will show you how to use the various features of the Signature Editor to customize your signatures.
To open the Signature Editor, click the File tab and select Options on the left side of the Account Information screen. Then, click Mail on the left side of the Options dialog box and click the Signatures button. For more details, refer to one of the articles mentioned above.
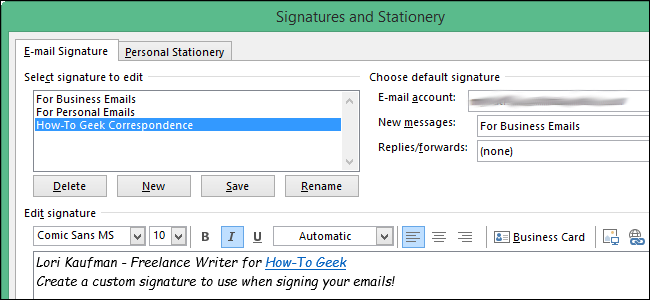
Changing the font for your signature is pretty self-explanatory. Select the text for which you want to change the font and select the desired font from the drop-down list.

You can also set the justification (left, center, right) for each line of text separately. The drop-down list that reads Automatic by default allows you to change the color of the selected text. Click OK to accept your changes and close the Signatures and Stationery dialog box.

To see your signature in an email, click Mail on the Navigation Bar.

Click New Email on the Home tab.

The Message window displays and your default signature is inserted into the body of the email.
NOTE: You shouldn’t use uncommon fonts in your signatures. In order for the recipient to see your signature as you intended, the font you choose also needs to be installed on the recipient’s computer. If the font is not installed, the recipient would see a different font, the wrong characters, or even placeholder characters, which are empty square boxes.
Close the Message window using the File tab or the X button in the upper, right corner of the Message window. You can save it as a draft if you want, but it’s not necessary.

If you decide to use a font that is not common, a better way to do so would be to create a signature as an image, or logo. Create your image or logo in an image editing program making it the exact size you want to use in your signature. Save the image in a file size as small as possible. The .jpg format works well for pictures, the .png format works well for detailed graphics, and the .gif format works well for simple graphics. The .gif format generally produces the smallest files.
To insert an image in your signature, open the Signatures and Stationery dialog box again. Either delete the text currently in the editor, if any, or create a new signature. Then, click the image button on the editor’s toolbar.

On the Insert Picture dialog box, navigate to the location of your image, select the file, and click Insert.

If you want to insert an image from the web, you must enter the full URL for the image in the File name edit box (instead of the local image filename). For example, http://www.somedomain.com/images/signaturepic.gif. If you want to link to the image at the specified URL, you must also select Link to File from the Insert drop-down list to maintain the URL reference.

The image is inserted into the Edit signature box. Click OK to accept your changes and close the Signatures and Stationery dialog box.

Create a new email message again. You’ll notice the image you inserted into the signature displays in the body of the message. Close the Message window using the File tab or the X button in the upper, right corner of the Message window.

You may want to put a link to a webpage or an email link in your signature. To do this, open the Signatures and Stationery dialog box again. Enter the text to display for the link, highlight the text, and click the Hyperlink button on the editor’s toolbar.

On the Insert Hyperlink dialog box, select the type of link from the list on the left and enter the webpage, email, or other type of address in the Address edit box. You can change the text that will display in the signature for the link in the Text to display edit box. Click OK to accept your changes and close the dialog box.

The link displays in the editor with the default blue, underlined text. Click OK to accept your changes and close the Signatures and Stationery dialog box.

Here’s an example of an email message with a link in the signature. Close the Message window using the File tab or the X button in the upper, right corner of the Message window.

You can also insert your contact information into your signature as a Business Card. To do so, click Business Card on the editor’s toolbar.

On the Insert Business Card dialog box, select the contact you want to insert as a Business Card. Select a size for the Business Card image from the Size drop-down list. Click OK.

The Business Card image displays in the Signature Editor. Click OK to accept your changes and close the Signatures and Stationery dialog box.

When you insert a Business Card into your signature, the Business Card image displays in the body of the email message and a .vcf file containing your contact information is attached to the email. This .vcf file can be imported into programs like Outlook that support this format.
Close the Message window using the File tab or the X button in the upper, right corner of the Message window.

You can also insert your Business Card into your signature without the image or without the .vcf file attached.
If you want to provide recipients with your contact info in a .vcf file, but don’t want to attach it to every email, you can upload the .vcf file to a location on the internet and add a link to the file, such as “Get my vCard,” in your signature.
NOTE: If you want to edit your business card, such as applying a different template to it, you must select a different View other than People for your Contacts folder so you can open the full contact editing window.