If you want to add a business card template to an existing contact in Outlook, you can do so without having to enter all of the information again. We will also show you how to customize the layout and format of the text on the card.
Microsoft provides a couple of business card templates you can use. We will use their Blue Sky template as an example.
To open the archive file for the template you downloaded, double-click on the .cab file.
NOTE: You can also use a tool like 7-Zip to open the archive.

A new Extract tab becomes available under Compressed Folder Tools and the files in the archive are listed. Select the .vcf file in the list of files. This automatically activates the Extract tab.

Click Extract To and select a location or select Choose location if the desired location is not on the drop-down menu.

Select a folder in which you want to save the .vcf file on the Copy Items dialog box and click Copy.
NOTE: Use the Make New Folder button to create a new folder for the location, if desired.

Double-click on the .vcf file that you copied out of the .cab archive file.

By default, .vcf files are associated with Outlook so, when you double-click on a .vcf file, it automatically opens in a Contact window in Outlook. Change the Full Name to match the existing contact to which you want to apply this template. Delete the other contact info from the template. If you want to add any additional information not in the existing contact, enter it.
Click Save & Close to save the contact with the new template.

The Duplicate Contact Detected dialog box displays. To update the existing contact, select the Update information of selected Contact option. Click Update.
NOTE: If you want to create a new contact from this template, select the Add new contact option.

With the Contacts folder open (the People link on the Navigation Bar), click Business Card in the Current View section of the Home tab. You may notice that not all the fields from your contact display on the business card you just updated. Double-click on the contact to update the contact and the business card.

On the Contact window, right-click on the image of the business card and select Edit Business Card from the popup menu.

The Edit Business Card dialog box displays. You can change the design of the card, including changing he background color or image. The Fields box allows you to specify which fields display on the business card and in what order.
Notice, in our example, that Company is listed below the Full Name, but no text displays on the business card below the name. That’s because we did not enter any information for Company in the Contact. We have information in Job Title. So, we select Company and click Remove to remove that field.

Now, we want to add Job Title. First, select the field below which you want to add the new field. We select Full Name to add the Job Title below that. Then, we click Add and select Organization | Job Title from the popup menu to insert the Job Title.

To make the Job Title white like the name, we select Job Title in the list of Fields and click the Font Color button in the Edit section.

On the Color dialog box, select the color you want to use for the text in the selected field. Click OK.

You can also make text bold, italic, or underlined. We chose to make the Job Title bold and the Full Name bold and italic.

We also need to remove the Business Phone because this contact only has a mobile phone number.

So, we add a Mobile Phone from the Phone submenu.

Then, we need to remove enough blank lines so the Mobile Phone is visible on the card.

We also added a website and email address and removed more blank lines so they are visible.

You can also move text to the right side of the card or make it centered on the card.

We also changed the color of the bottom three lines to blue. Click OK to accept your changes and close the dialog box.

Your new business card design displays on the Contact window.

Click Save & Close to save the changes you made to the business card for this contact and close the Contact window.

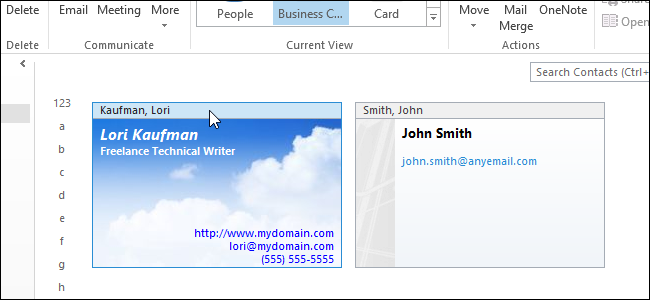
The final design of the business card displays in the Business Card view on the People screen.

If you have a signature that contains the business card for the contact you just updated, you will also need to update the signature by removing the business card and adding it again using the Business Card button in the Signature editor. You can also add the updated Business Card to a signature without the image or without the vCard (.vcf) file.