Quick Links
In this guide we'll take you through the steps to setup a folder on your Windows computer as an FTP repository, using a free program called FileZilla. FTP can be used to easily transfer a lot of files between computers; the FTP repository can be mapped to multiple computers across the Internet so that other people can access the directory right from Windows Explorer.
To start, you'll need to download FileZilla server, available here.
After downloading the program, you can install it with all of the default settings. FileZilla will install a service that runs whenever Windows boots up, so if you would rather only run the FTP server manually, select the appropriate option from the drop down menu on the third screen:

Apart from that setting, everything else can be left at the defaults for the purpose of this tutorial. Once installation is complete, the FileZilla interface will open. Just click OK when this window pops up right after installation:

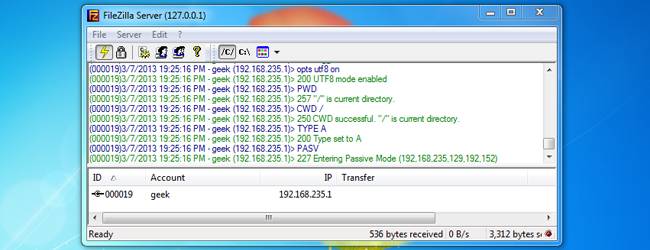
Once the FTP server interface has loaded, we are ready to specify a directory as an FTP repository. If the directory you want to use isn't already created, minimize the interface and create a folder where you want the FTP share to be. In this tutorial, we are going to use the folder 'FTP' on our desktop. Its exact location will be "C:\Users\geek\Desktop\FTP".
Click on Edit and then Users.

On the left side of the window that comes up, click on "Shared folders."

Once there, click on "Add" underneath "Users." Enter the username for an account that another computer will be using to access the repository we're setting up.

Click OK once you're done entering the account name, and then click on "Add" underneath the "Shared folders" section. Once you've done that, a window like the one below will pop up, use it to select the directory you would like to share as an FTP repository.

Click OK. Now we need to assign the user permissions for this repository. By default, the user we've created is able to read files, list directories, and list subdirectories. To give the user further permissions, such as the ability to copy files to this repository, check the boxes beneath 'Files' and 'Directories.'

Click OK once you're done setting the user permissions.
Securing Your FTP Server
Along with configuring the user(s) with a strong password, there are a few settings within FileZilla that you can configure to further secure your new FTP server.
Hackers will constantly scan the internet for hosts listening on port 21, the default FTP port. To avoid being detected by the thousands of hackers constantly scanning for people like you with an FTP server, we can change the port that FileZilla listens on. Go to Edit and then Settings. Under "General settings" you'll see "Listen on these ports." It should currently be on 21, but we recommend changing it to a random five digit number (nothing over 65535).

This doesn't necessarily secure your server, but it obscures it and makes it harder to find. Just remember that anyone determined to hack you will eventually find the port your FTP server is listening on, so further measures must be taken.
As long as you know the IP's (or at least the IP range) of the computers connecting to your FTP server, you can set FileZilla to only respond to login requests from those IP addresses. Under Edit > Settings, click on "IP Filter."
In the first box, put an asterisk to block all IP's from connecting to your server. In the second box, add exceptions to this rule (IP's or network ranges that should be allowed to connect). For example, the following screenshot shows a configuration in which 10.1.1.120 and the 192.168.1.0/24 (in other words, 192.168.1.1 - 192.168.1.255) IP range would be able to connect:

Along with secure passwords, that should be about all the security your FTP server will need. There is a default Autoban setting already configured in FileZilla, so anyone who tries connecting to your server too many times within a short period will be locked out for a while. To tweak this setting, click on "Autoban" under Edit > Settings, but the default will suffice for most people.
One last note on the security of this FTP server: transmissions are in clear-text, so don't use plain FTP to transfer anything confidential. SFTP or FTPS can be used for encrypting FTP communications, and it's easy to setup FileZilla to work with SFTP or FTPS.
Windows Firewall Exception
If you have a third party firewall or anti-virus program, be sure that the port you've chosen to run your FTP server on is allowed through it. If you have Windows Firewall enabled, you'll need to add an exception for the port. Go to your Start menu and type Windows Firewall, then click on "Windows Firewall with Advanced Security."

Click on "Inbound Rules" in the left column, and then "New Rule..." in the right column. We'll be allowing a port through the firewall, so select Port when the wizard asks "What type of rule would you like to create" and then click next.
Type in the port you have chosen for your FTP server to run on (default is 21, but in this guide we chose 54218).
Click next three times after entering your port number. Put in a name and description for this exception so it's easy to find in the future, and then click Finish.
Mapping the FTP Share on another Computer
Now that the FTP server is completely set up, we can have other people connect to it with the user information we provide them (also make sure you have allowed their IP address). Others could always use GUI applications such as FileZilla to connect to your FTP share, or they could map it to their computer so it shows up in Explorer.
Open 'Computer' and right click in a blank area, then select "Add a network location."
The "Add Network Location" wizard will appear, click next twice. Enter the IP address and port of your FTP server, and click next.
Uncheck "Log on anonymously" and enter the username you have configured for your FTP server. Click next twice and then click finish. It should ask you for your password, and then you will be able to browse to the FTP share as if it were a local hard drive.