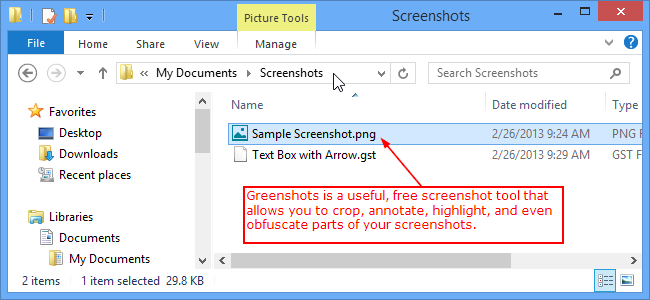
There are many programs available for taking screenshots. If you're looking for a free option, Greenshot is a great program that provides many useful features, such as cropping, annotations, highlights, and obfuscating (like the smudge tool in GIMP).
You can capture a selected region, window, or full screen and then save and export your screenshots in various ways. You can even directly upload your images to websites like Flickr, Picasa, or Dropbox.
It is free for both personal and commercial use and runs in Windows. We tested it in Windows 8, 64-bit.
To install Greenshot, double-click the .exe file you have downloaded (see the link at the end of the article). If the User Account Control dialog box displays, click Yes to continue -- you may not see this dialog box, depending on your User Account Control settings.
Follow the instructions throughout the setup wizard. On the Select Components screen, select which plugins and languages you want to install. The plugins allow you to quickly and easily insert your screenshots into other programs or upload them to online storage and sharing services.

When the installation is finished, you may see this error. If so, click OK. It will not affect the running of Greenshot.

If you have other programs running that have the listed hotkeys setup, you will see the following warning dialog. To resolve this problem, either change the hotkeys in the other programs or in Greenshot. We will explain how to do this in Greenshot later in this article.

Greenshot requires at least .NET Framework 3.5 to run. If it is not installed on your computer, the setup wizard provides an opportunity to download and install it automatically.

If you've installed Greenshot in Windows 8, a tile is added to the Modern UI screen, as well as a tile allowing you to uninstall Greenshot, if desired.

If you're in Windows 8, go back to the Desktop by clicking the Desktop tile on the Modern UI screen or press Windows Key + D. Right-click on the Greenshot icon in the system tray to access the Greenshot menu. Using this menu, you can take different types of screenshots, open an image in the Greenshot editor, set Preferences, and perform several other useful tasks.

As an example, we took a screenshot of an Explorer window using the Alt + Prnt Scrn hotkey. A popup menu displays asking what we want to do with the screenshot. We chose to open it in Greenshot's image editor to add some enhancements to it, so we selected Open in image editor.

The Greenshot image editor opens and displays the screenshot we took. One of the useful tools Greenshot supplies is an obfuscating tool. If there is private information on a screenshot, you can use this tool to block it out. Click the Obfuscate tool on the toolbar on the left.

Draw a box around the area you want to block out.

The text is blocked out so it can't be read or recognized.

With the obfuscated area still selected, you can change the method used to obfuscate the area by selecting Pixelize (increases the pixel size for the selected area) or Blur (blurs the selected area) from the drop-down list on the toolbar above the screenshot. This toolbar is where options display for the selected tool on the left toolbar.

You can also annotate your screenshots by adding text boxes, arrows, shapes, and lines.
Different effects are available to apply to your screenshot, such as a border, drop shadow, and torn edge.

When you have finished customizing your screenshot, you can save it in different formats, send it to other programs, or upload it directly to online storing and sharing services, such as Dropbox and Imgur.
NOTE: The available online services depend on which ones you chose to install when you installed Greenshot.
We decided to save our screenshot to disk, so we selected Save as.
NOTE: You can customize the Output settings on the Preferences dialog box (discussed later) and use the Save directly option to save the screenshot using your preferred settings.

Select a location for the file and enter a filename in the File name edit box. Select an image type from the Save as type drop-down list and click Save.

If you use the same elements on most of your screenshots, such as a text field containing common text or obfuscating the same element on multiple screenshots, you can save those elements and load them onto future screenshots. To do this, select Save objects to file from the Object menu.
Use the Load objects from file option to apply the same objects onto another screenshot.

Select a location for the template file and enter a name for the file in the File name edit box. The .gst extension is automatically added to the template file. Click Save.

There are many settings you can customize, such as the hotkeys used to take the various types of screenshots. To access the Settings dialog box, select Preferences from the Edit menu. The Hotkeys settings are on the General tab.
The Capture tab allows you to specify settings such as whether to include the mouse pointer in the screenshot, to allow capture of complete, scrolling webpages in Internet Explorer, and to have the Greenshot image editor window match the size of the screenshot captured when it opens.
On the Output tab, specify such settings as the default storage location of the screenshots, the pattern for the default name of each screenshot, the default image format selected, and the quality settings.
Other settings include options for printing screenshots on the Printer tab and configuring installed plugins on the Plugins tab.

To close the Greenshot image editor, select Close from the File menu. This doesn't exit Greenshot, which is still available in the system tray allowing you to take additional screenshots.
To completely exit Greenshot, right-click on the system tray icon and select Exit from the popup menu.

Greenshot is configurable and easy to use and provides a useful, free option for a screenshot tool for technical writers, software developers, project managers, or anyone else who needs to create screenshots.
Download Greenshot from http://getgreenshot.org/downloads/.