Avidemux is an easy-to-use, open-source video editor for Windows, Mac OS X, and Linux. It's ideal for basic video-editing tasks. Unlike more advanced programs, it doesn't have a lot of complex features that get in the way.
We've covered using Avidemux to quickly cut clips from a video file in the past, but there's a lot more you can do with this application. You can download it for free.
Getting Started
First, launch Avidemux and open your video file from the File menu. You can easily combine multiple video files by opening additional video files with the Append option. Each video you add is added to the end of the current video.

Basic Editing
To move, copy, or delete a section of the video, you must first select it with the controls at the bottom of the video. Use Drag the slider, click the seek buttons, or just plug an exact from or time in. You can also click the Play button and click Stop when you reach the desired point.

After navigating to a specific point, mark the current point in the video with the A or B buttons. The A button marks the point as the beginning of the selection, while the B button marks it as the end of the selection. Your selection will be indicated with a blue rectangle on the seek bar.

The options in the Edit menu work on the current selection. You can cut, copy and paste portions of the video -- when you use Paste, Avidemux inserts the selection at the current point in the video. Delete removes a selection entirely.
Use the Reset Edits button if you want to revert your changes.
Transcoding
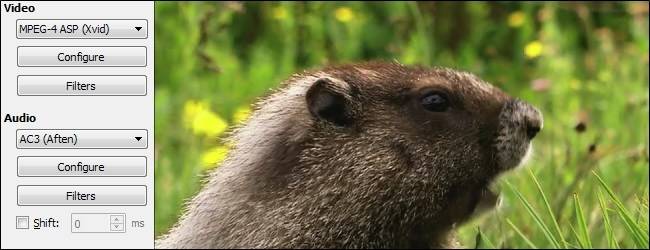
By default, Avidemux edits your video without transcoding it to another format, so you won't lose quality -- this is what the "Copy" setting means. To apply filters to the video or audio, it must be transcoded. You can select new formats from the Video or Audio boxes at the left side of the video.
The Configure button in each section allows you to customize the audio or video encoding settings, although the defaults will probably work fine.

Filters
Filters can modify the audio or video -- click the Filters button in either section to get started. The Audio filters dialog allows you to shift the audio to synchronize it with the video, change its perceived loudness level, and perform other operations.

The Video Filters dialog has much more options. It contains everything from filters that can resize, crop, or fade the video to a "useless whirlwind effect."

To use a filter, select it and click the plus-sign-shaped Add button. You'll see the filter's options.

Each filter you add will appear in the Active Filters section. If you want to apply a filter to only a specific section of the video, select the filter and click the Partial button. This will allow you to fade out certain section of the video for transitions, for example.

After selecting your filters, click Close. They won't be applied immediately -- they'll be applied when you export your video.
Saving the Video
To export your edited video, use the Save -> Save Video option in the File menu.

Avidemux will encode the video and save it to your computer.

There's a lot more you can do with Avidemux -- for example, you can use the Auto menu to automatically apply the appropriate settings to convert a video for use on a DVD, iPhone, or other type of media.