Have you installed Windows 8 on a spare PC and now need to get files from that PC to your Windows 7 PC, or vice versa? It is easy to network the two machines if they are both on your home network.
We’ll show you how you can share files between a Windows 8 PC and a Windows 7 PC by sharing a folder on the Windows 7 machine and then mapping to that folder in Windows 8 as a network drive.
First, you need to share a folder on your Windows 7 PC. You could just share your C: drive and have access to all folders from Windows 8. However, we recommend you create a special folder for transferring files. That way, you limit access to your Windows 7 PC.
Create a new folder somewhere on your Windows 7 PC, right-click on it, and select Properties from the popup menu.

On the Properties dialog box, click the Sharing tab and then click Advanced Sharing.

On the Advanced Sharing dialog box, click the Share this folder check box to turn on sharing for this folder. Then, click Permissions.

On the Permissions dialog box, you’ll see Everyone listed in the Group or user names list. You can leave that is there are other users on your Windows 7 PC who you want to have access to this folder from the Windows 8 PC. If that’s the case, click the Full Control check box in the Allow column to give full read and write privileges and click OK.
However, we will also show you how to restrict access on the Windows 8 PC to your user account only on your Windows 7 PC. Click on Everyone in the Group or user names list and click Remove.

Click Add.

On the Select Users or Groups dialog box, type your username for the Windows 7 PC in the Enter the object names to select box. Click Check Names.

The Windows 7 computer name is added to your username. Click OK.

You’ll now see your username in the Group or user names list. Select it and click the Full Control check box in the Allow column to give yourself full read and write privileges for the folder and click OK.

You are returned to the Advanced Sharing dialog box. Click OK to close it.

Then, click Close to close the Properties dialog box for the folder.

Before mapping to your new shared folder on your Windows 7 PC, you need to know either the IP address of your Windows 7 PC or the computer name. To check the IP address for your PC, open the Start menu, type “cmd” (without the quotes) in the search box, and press enter when the “cmd.exe” link is highlighted in the results. At the command prompt, type the following command:
ipconfig /all
You’ll see a list of connections display. It may be a long list, depending on how many LAN and wireless connections you have. Look through the list until you find an IP address for the appropriate adapter. We are using Windows 8 in a virtual machine using VMware, so the IP address we need to use is in the “Ethernet adapter VMware Network Adapter VMnet8” section.

However, if you are running Windows 8 on a physical machine that is connected wireless to your home network, along with your Windows 7 machine, you’ll probably find the IP address you need to use in the “Wireless LAN adapter” section.

To check the name of your Windows 7 PC, right-click on Computer on the Start menu and select Properties from the popup menu.

Your computer name is found in the Computer name, domain, and workgroup settings section of the System window that displays.
NOTE: Make a note of both the computer name and the IP address for your Windows 7 PC. Even if you want to use the computer name, you should know the IP address in case using the computer name doesn’t work.

Once you have the IP address and computer name for your Windows 7 PC, switch to your Windows 8 PC and click the Desktop tile on the Start screen.

Click the Windows Explorer icon on the Taskbar.

In the navigation pane on the Explorer window, right-click on Network and select Map network drive from the popup menu.

Select a drive letter to use from the Drive drop-down list. Enter either the path to the folder you shared on your Windows 7 PC using either the computer name or the IP address. The image below shows the IP address being used. Be sure to use two backslashes before the IP address or computer name and one before the name of the shared folder. If you want to reconnect to this folder every time you log into Windows 8, select the Reconnect at sign-in check box. Click Finish.

As an example, the following image shows us connecting to the shared folder using the Windows 7 computer name.

You may see the following dialog box, if the connection is taking a while, or if it is not working.

If the Windows 7 PC was found, the Windows security dialog box displays. Enter your user name and password for the Windows 7 PC. If you selected to reconnect at sign-in when mapping the network drive, you might want to select the Remember my credentials check box, so log in to the folder on your Windows 7 PC will be automatic. Click OK.

You may see a message telling you that “Network discovery and file sharing are turned off.” If so, click the message and select Turn on network discovery and file sharing from the popup menu.

The Network discovery and file sharing dialog box displays, asking if you want to turn it on for all public networks. We recommend that you select No and only turn on network discovery and file sharing for private networks, for security reasons.

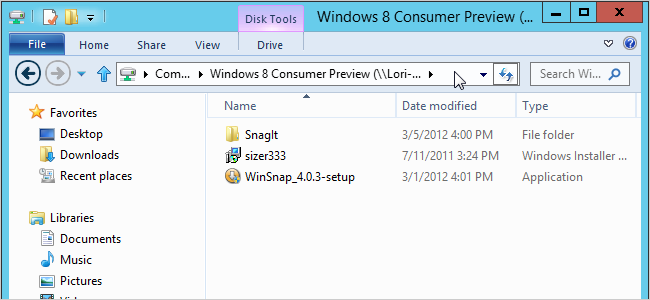
You should now see your shared folder from your Windows 7 PC under Computer in the Navigation pane in Windows Explorer.

Now, you can play around with Windows 8 and be able to transfer any files you create or download in Windows 8 to your Windows 7 PC, as well. You can also put files in the shared folder from your Windows 7 PC and copy them to your Windows 8 PC. This is useful for testing software you’ve already downloaded for Windows 7 in Windows 8.