If you just installed Windows 8 or Windows 10 on your laptop and the screen won’t stay at the brightness level you want, it’s probably because the adaptive brightness feature isn’t working right on your system. Here’s how to disable it.
Naturally, it would be best to have the feature actually work, so you could make sure to update your drivers. If you still want to disable, here’s how to do it.
Adjusting the Brightness in Windows 8 or Windows 10
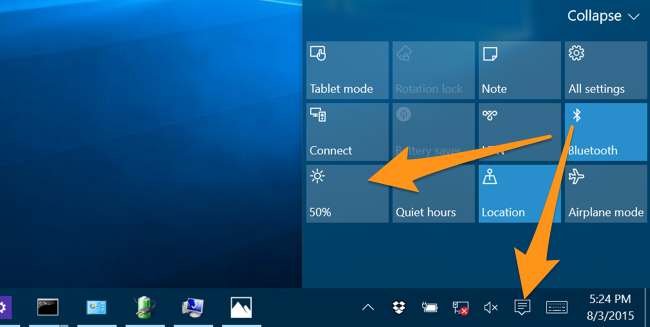
Just so we’re clear, here’s how to change the brightness on your Windows 8 laptop… hit the Win+I shortcut key combination (that’s a capital i), and then you’ll see the brightness control right there.
If you're in Windows 10, you can click on the Notifications icon in the tray to slide out the panel, which will look a little different, but should have a brightness control on it.
On my MacBook Air, this setting kept fluxuating up and down.
Disabling Adaptive Brightness in Windows 8 or 10
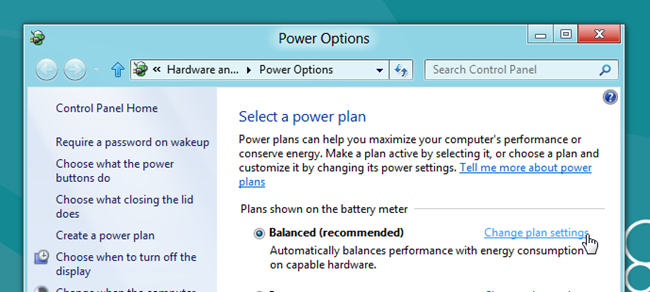
Hit the Windows key, and then type in "Power Options" into the search, which will pull up the Power Options panel.
Once here, click the “Change plan settings” link on the selected plan.
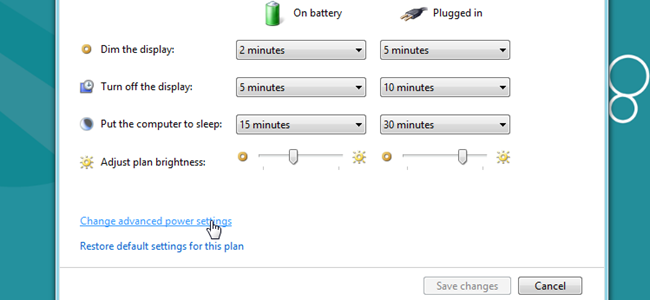
Then click the “Change advanced power settings” link.
And now, browse down to Display –> Enable adaptive brightness, and change the settings there to Off.
Changing this setting fixed my brightness problems on my MacBook Air running Windows through Boot Camp.


