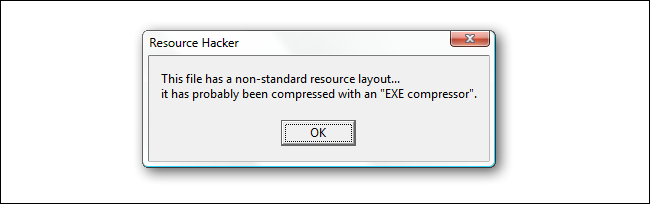
We've previously shown you how to modify the icon on an .EXE file, but if you've tried this you might find out that some apps and programs give you an error that says "This file has a non-standard resource layout... it has probably been compressed with an "EXE compressor". Here's how to fix it.
In this tutorial I'll show you how to decompress such files and I'll show you another program you can use to modify the icons. For my example I will use my all time favorite program Irfanview.
This guest article was written by forum member Sarah James
How to Modify Icons on Compressed .EXE Files
Irfanview is a wonderfull little imageviewer with lots and lots of options, but since it has been around ever since Win98 it's icons look rather outdated. To change the look of the program itself is easy. Just select another skin and you have another -- more modern looking -- toolbar, like the gorgeous Windows 7 style toolbar you can download here.
So you go from this:

To this

But you're still stuck with the old program icon. Yuk.

And even worse: you can create lovely screensavers with Irfanview, as I've described here, but they also have an ugly 32x32 pixelicon. Now that just won't do.

Actually I've been wanting to change these icons (and a lot of others of compressed files) for a long time, but was unable to, because I couldn't unpack the exe. A big thanks goes to Phew on the Irfanview Forum. Without him I never would have thought of UPX.
The Tools You Need
There are ways to change the icons, using icoFX or ResHack and an unpacker called UPX. I prefer to use IcoFX for this over ResHack ánd I prefer to use the last freeware version.
IcoFX has lately become shareware with lots and lots of options. Very nice if you want to draw your own icons and cursors, but for me it feels like overkill. If I want to draw an icon I prefer to use an image editor like the gimp or paintshop pro.
You can use the new IcoFX2 15 times and then the save function is disabled. Which is long enough if you just want to use it for this tutorial and it will give you a feel of the program. There is however an older version 1.6.4. that is freeware. You can still find it on Filehippo and it works perfectly fine. There is also a portable version 1.6.4. here.
You also need some nice icons.

For the exe there is an excellent replacement Icon IrfanView by ~ncrow.
For the screensavers it is a matter of taste, I chose one of the icons from Another Monitor Dock Icons by MediaDesign

And with that png template he includes you can even make your own :)
Using UPX and the command prompt
UPX is a command prompt utility. On how to work with the command prompt have a look here. And I like to be able to use the command prompt in the folder I'm working at that moment, without having to manually search for my folder within the command prompt, so I use this.
So instead of having to go from C:\Users\Sarah\ to D:\Irfanview Project I directly open my command prompt in D:\Irfanview Project.
Neat huh?

To install UPX rightclick upx.exe, choose Run as administrator and a command window will flash by. You might need to restart your computer for it to work.
Now you are set to start unpacking I_view.exe and Slideshow.exe. First browse to the program folder of Irfanview by default C:\Program Files\Irfanview. Copy I_view.exe to your working folder. Mine is called Irfanview Project. Then browse to C:\Program Files\Irfanview\Plugins and copy Slideshow.exe to your working folder. Create a new folder in your working folder and call it Icons. Right-click on this folder and choose Command Prompt Window here.
In the command prompt window you type upx -d i_view32.exe.

Hit the key Enter on your keyboard and the exe will be unpacked.

Do the same for Slideshow.exe.
Editing the icons
Next copy the png files you want to use as icons to the folder Icons and open IcoFX. In this tutorial I use IcoFX 1.6.4. I prefer to convert the png files to icons myself, so I can choose what formats I want, but you can also use the ico files.
Go to Tools > Batch Process...

There you will be presented with a host of options. Make sure Create icons from Images is ticked. Next use the add button to add the png files you want to convert to icons. Below that are a lot of image formats. I generally choose only XP colors ánd I make sure 128x128 is ticked.
Without the 128x128 format the icons will show as 48x48 in Vista when you choose 'Large Icons' in explorer.
I don't tick the 256 and 16 colors, since I only use my icons on Vista or 7, but for maximum usability you can tick the others too. It will make your icon file a bit larger, but since size is not a problem these days you can afford to indulge :)

Hit OK and in a few seconds you have two suitable icons to work with.
Inserting the icons
Now we are finally ready to change the icons in the program itself.
Go to Tools > Resource Editor ...

This will open an empty window like this:

Use the yellow open file icon to browse to i_view32.exe in your working folder and click Open. Now you can see all the icons that are stored within the exe. You can change all of them, but for the purpose of this tutorial we only do the first one.
As a sidenote: Irfanview also has it's file icons stored in Icons.dll which you find in the plugins folder. You can also change all those icons to the ones you like!

Right-click on the first icon and select Change.

Browse to your icon and click Open.

Voila there is your new icon.
Click the blue save button.

And if all went allright you should see File saved successfully!
Click OK.

Repeat the procedure for Slideshow.exe.
And then you can take a look at your working folder.

You now have the exe files with the new icons and the old ones have automatically been backed up with the extension .bak added to their name. I have given bak files a black recycle bin icon -- you probably see a generic icon and the extension .bak after the name.
Sometimes you don't see the new icons, because Windows keeps the old image in it's cache. A restart generally fixes that, so don't worry about it at this point.
Optional: packing the exe
If you like to save space you can now repack the exe files. Open the command prompt in your working folder and type upx i_view32.exe. For the slideshow you use upx slideshow.exe

Now copy i_view32.exe and slideshow.exe to the Irfanview program folder (replace the old exe files or move them out of the way).
Testing your new icons
Now we are going to test if newly created screensavers actually have the new slideshow icon. There isn't much to test on the program icon -- you can see that appear in the lefthand corner whenever you open Irfanview. Open Irfanview and then open the slideshow menu by clicking the second button on the left.

You'll get the last saved slideshow menu you entered. (see this tutorial at 7tutorials for more details)

Save the slideshow as screensaver and have a look in the folder where you saved it. It should look like this:
Conclusion
As shown here with a bit of persistence you can even modify older programs to fit the look of Vista and Windows 7 and so keep a superb little program like Irfanview as a modern addition to your system.